Configuring SendGrid email on WHM
SendGrid is a cloud-based SMTP service that enables email delivery without the need to manage email servers.
NB: Port 25 is closed for connection on our VMs by default. If you want to open port 25, buy Mail Bridge and configure it in Starlight™ Manager.
To configure the Mailgun email on WHM, please use this guide.
Please follow the steps below to configure the SendGrid service and Email System for your domain name on the WHM side:
Step 1. Sign up for SendGrid:
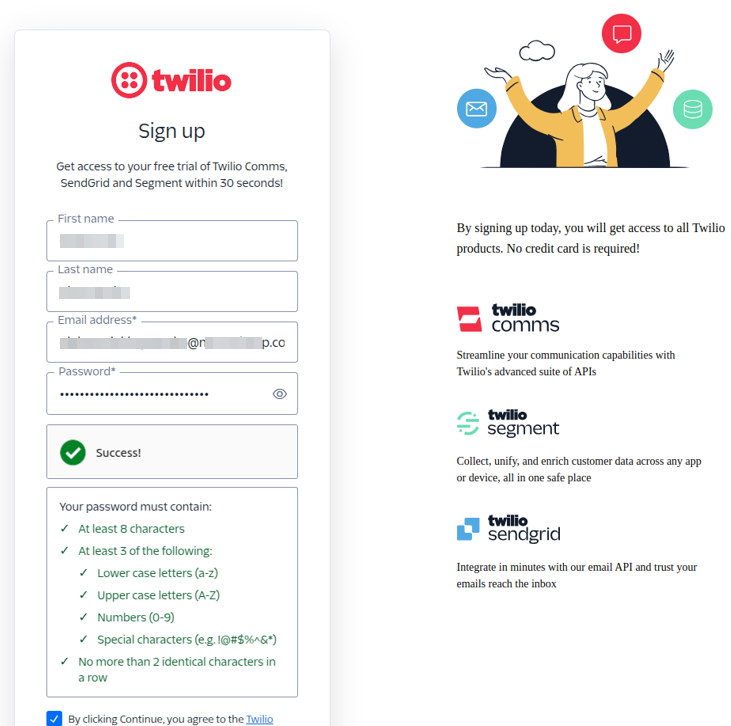
Once you fill in all the contact information, click on “Continue”.
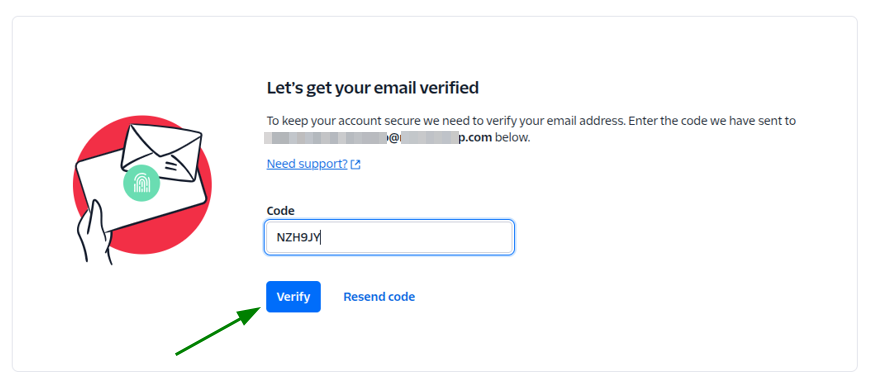
Step 2. You’ll be redirected to a new tab in the browser to verify your email account. Copy the verification code sent to your email account enter it under the “Code” field and click “Verify”:
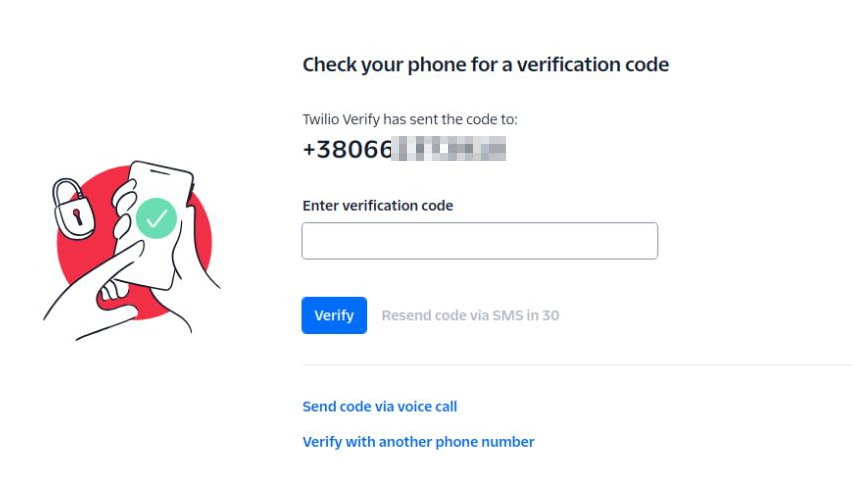
Step 3. Verify your phone number by entering the verification code sent to it under the “Enter certification code” field and click on “Verify”:
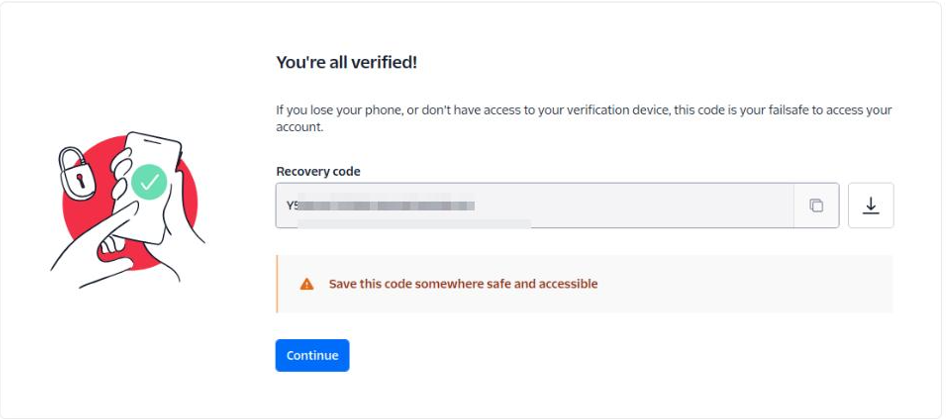
Step 4. Then, you’ll be provided with the recovery code that is helpful in cases of losing your phone or not having access to your verification device. Copy the code, save it, and click “Continue”. There is also an option to download the code as a file:
Step 5. Fill in your contact information on the next page and click on “Next”:
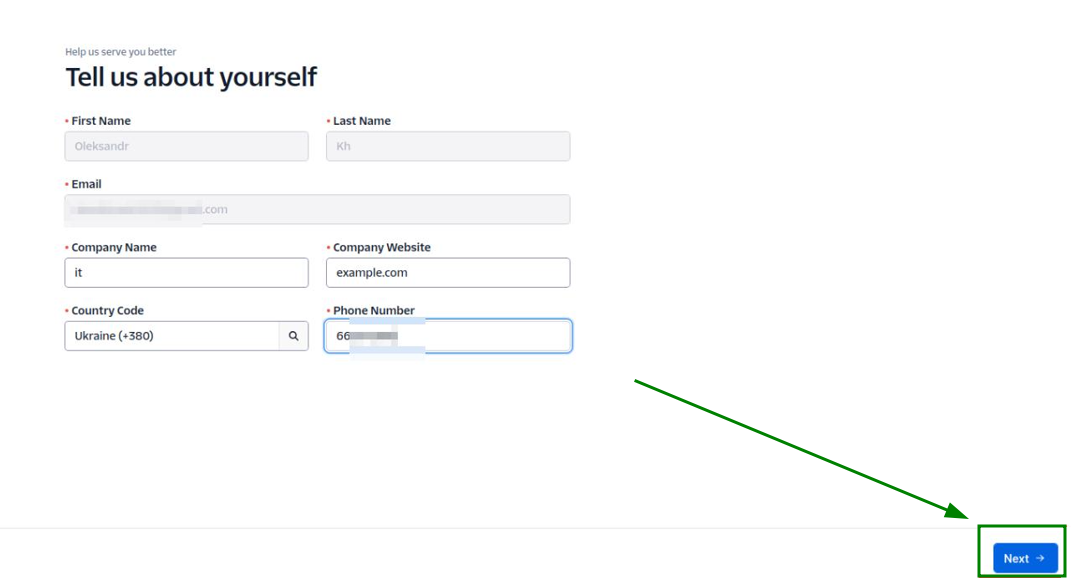
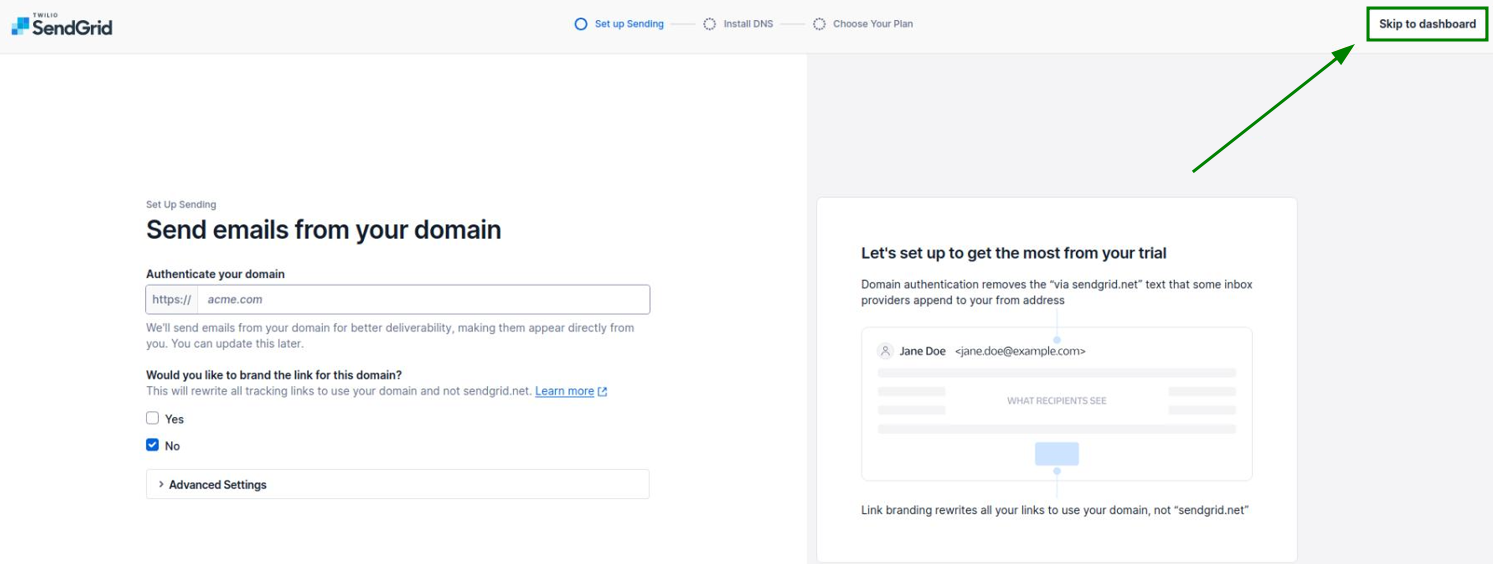
Step 6. From the next page, please open your SendGrid dashboard:
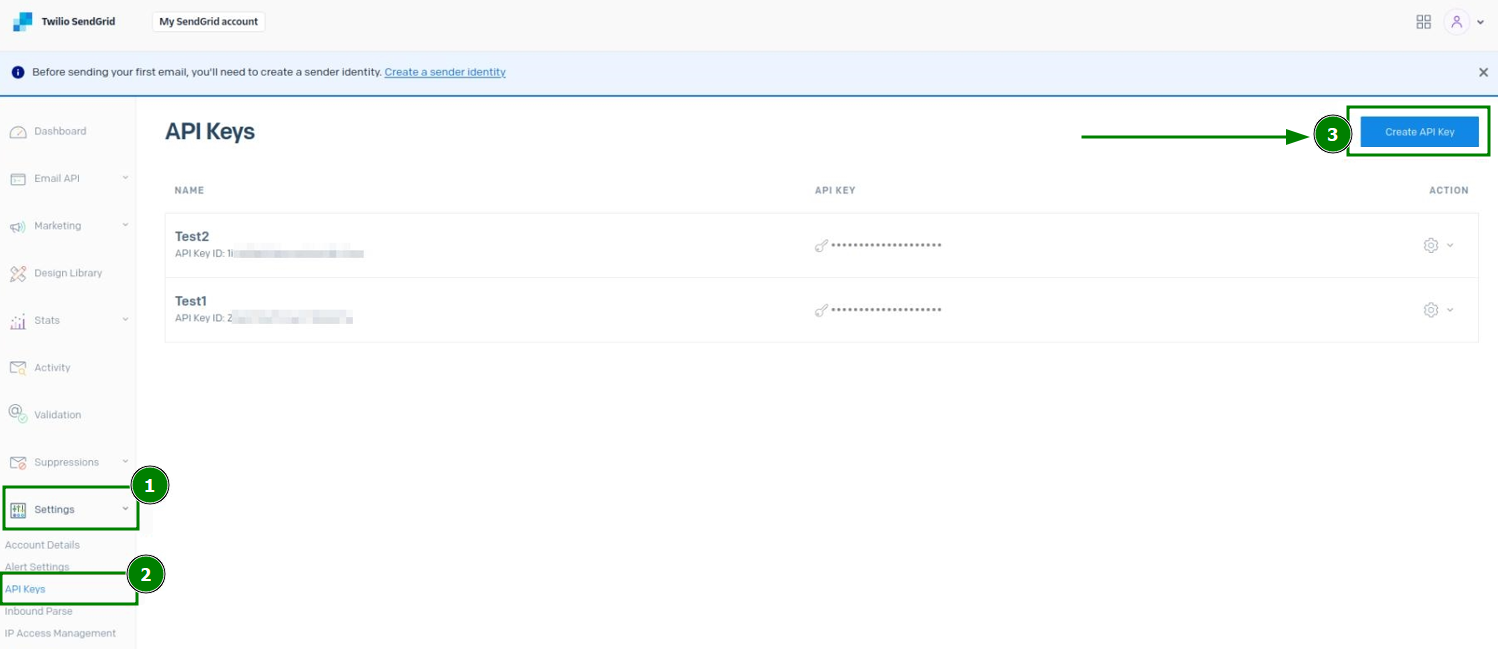
Step 7. Once you’re there, go to “Settings” >> the “API Keys” menu to create a new API Key there:
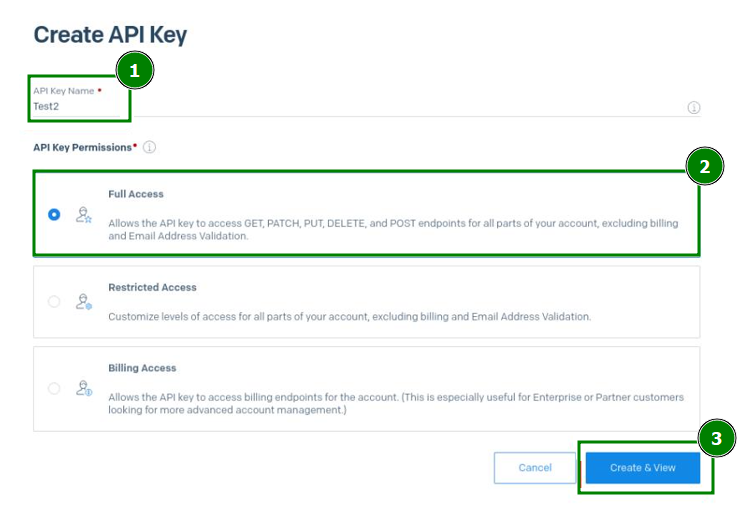
Step 8. In the menu open, enter the API Key name, set the API Key permissions to the “Full Access” option, and save the configuration:
Step 9. Set up the SendGrid Sender Authentication. There are two ways of doing that:
Method 1: Single Sender Verification
Single Sender Verification - is a quick method of verification that allows adding an authorised recipient (single (or several) email address(es)) when using a SendGrid account. It can be used, for instance, if you want to send emails from john.doe@example.com that is added in the cPanel server to jane.doe@gmail.com. The jane.doe@gmail.com email address should be added to Single Sender Verification on SendGrid for this.
NB: Single Sender Verification is recommended for testing only.
NB: You can send only from the address you verify rather than any address on an authenticated domain.
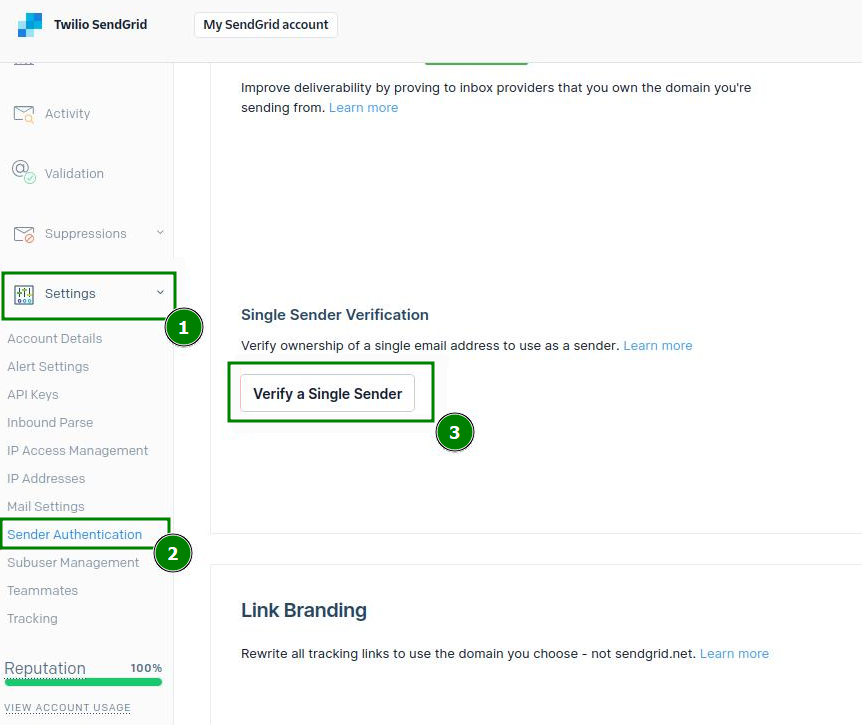
To set up the Single Sender Verification, navigate to “Settings” from your SendGrid dashboard >> the “Sender Authentication” menu >> click on the “Verify a Single Sender” button:
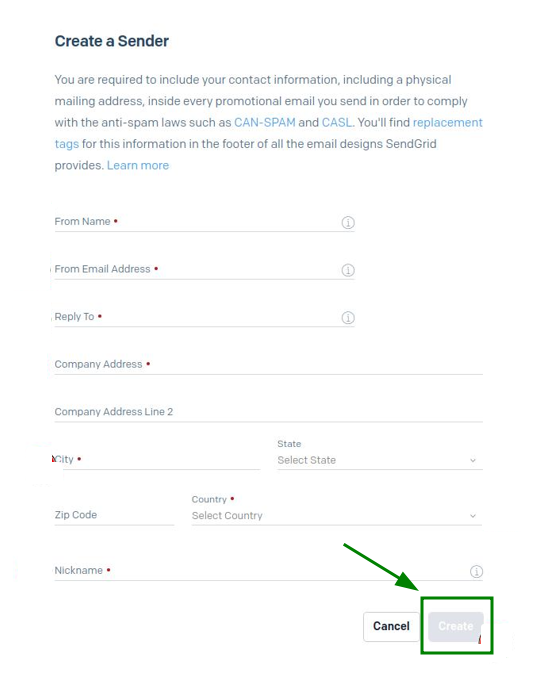
On the next page, create a sender by filling in contact information and click on “Create” to save everything:
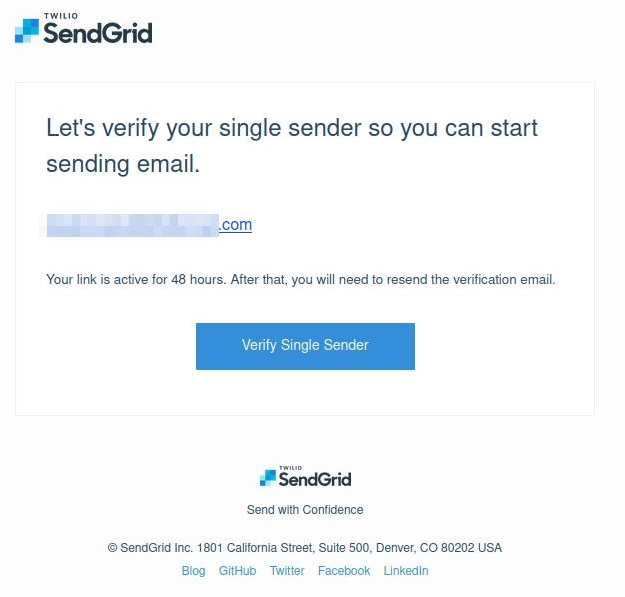
After that, you will receive a verification email from SendGrid. To confirm adding the email address, click on the “Verify Single Sender” button from the email:
Method 2: Domain Authentication (recommended)
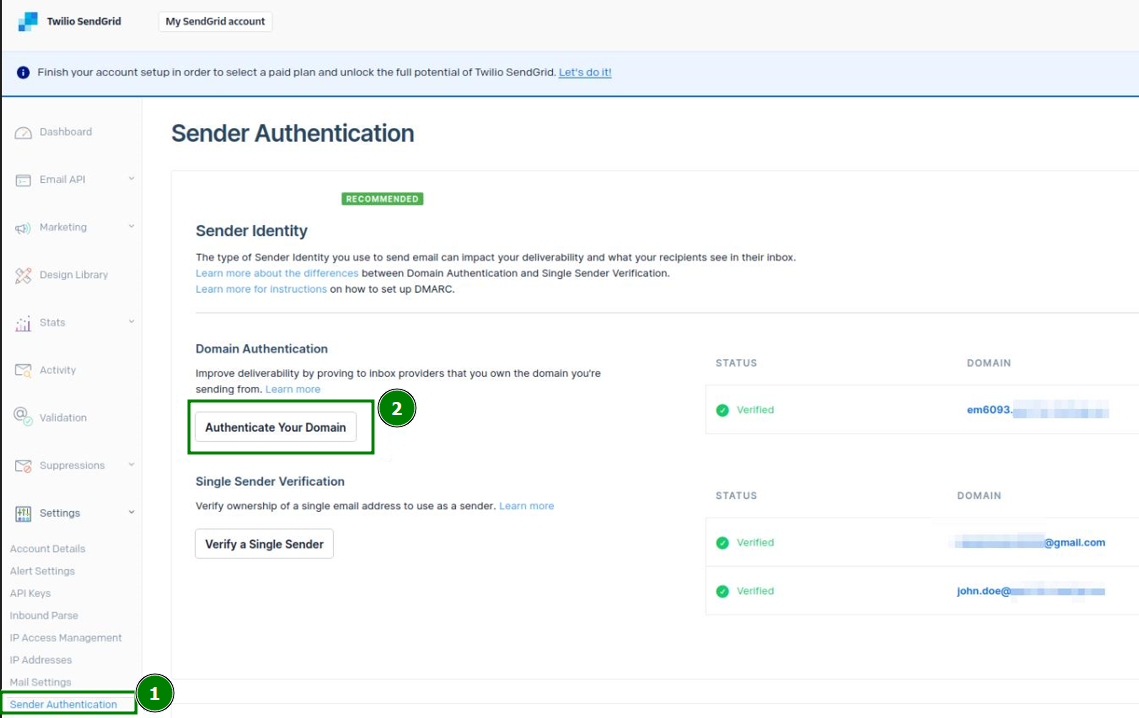
Click on “Settings” >> navigate to the “Sender Authentication” menu >> under the “Domain Authentication” field, click on “Authenticate Your Domain”:
On the next page, authenticate your domain name by answering the questions from the first and second steps and click on “Next”:
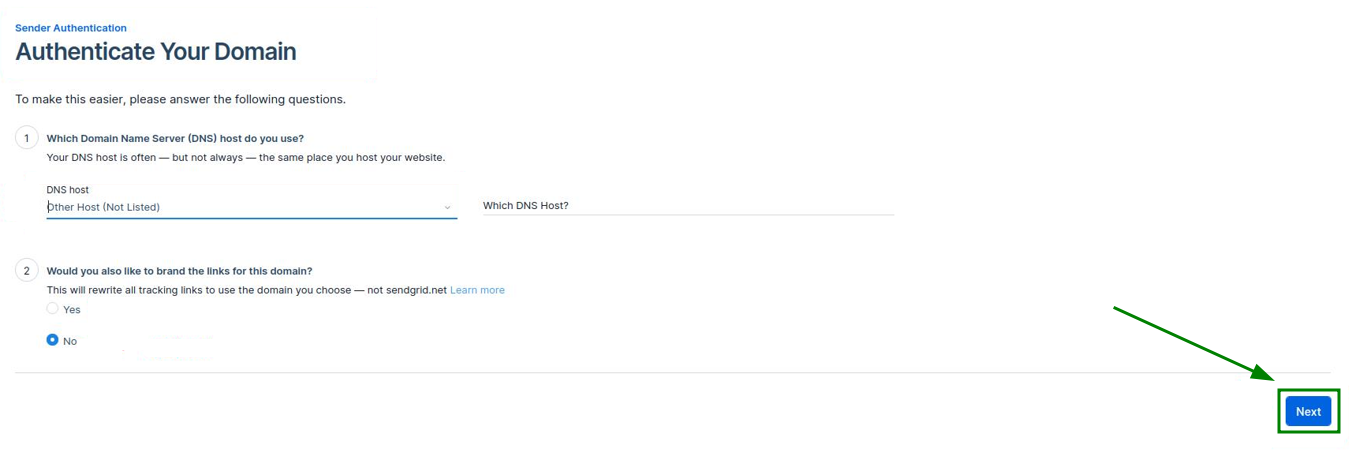
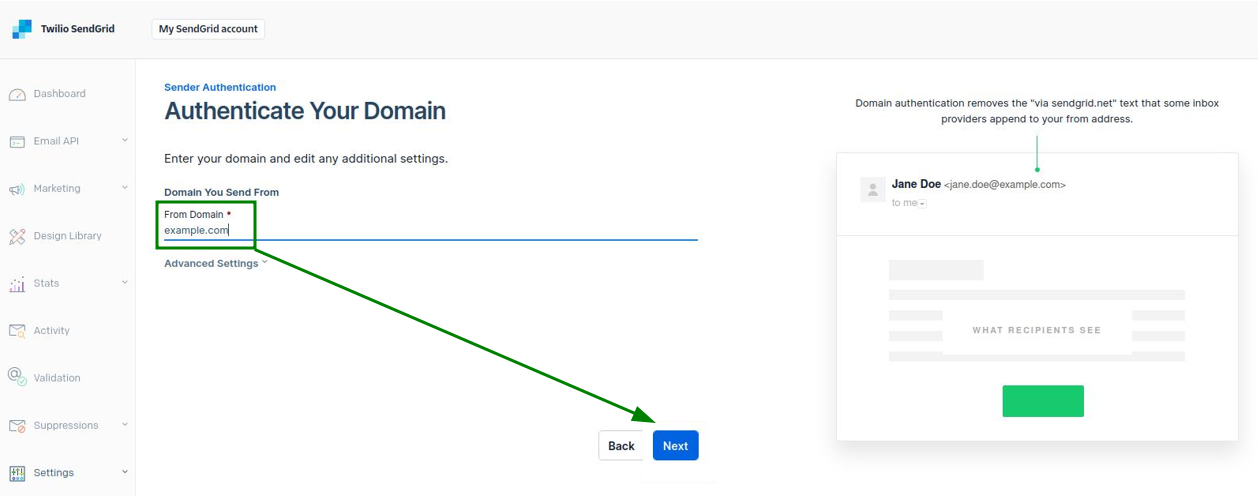
NB: In the screenshot, we have chosen the “No” answer to the second question. However, this reply is optional.After that, enter the needed domain name, set any additional settings if needed, and click on “Next”:
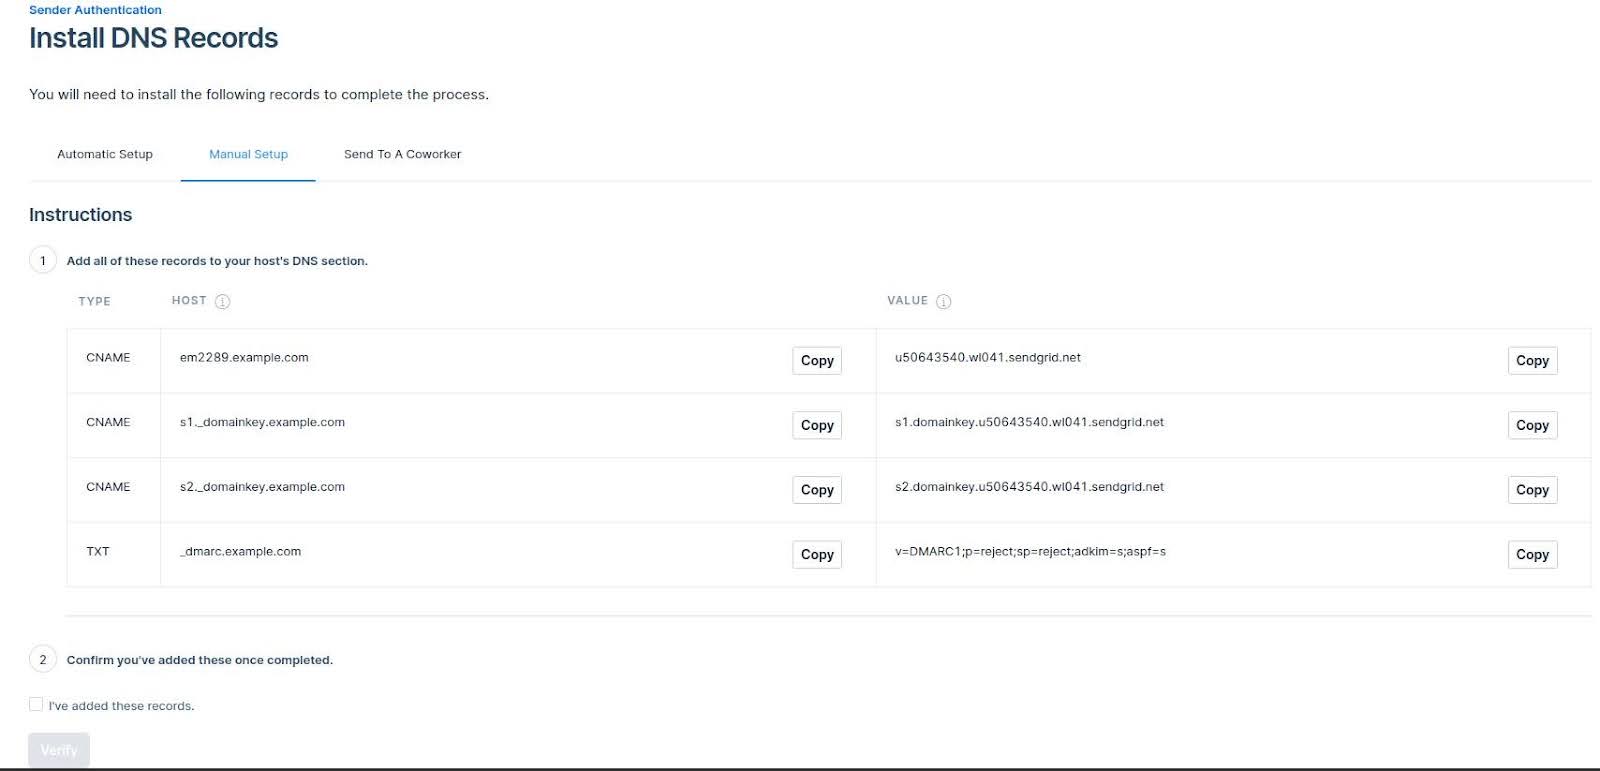
Now, it is necessary to verify the domain name by configuring the corresponding CNAME and TXT DNS records.
Once the DNS records are created for the domain, confirm their addition in step 2 by ticking the “I’ve added these records” box and click “Verify” below:
NB: It may take up to 24–48 hours for the DNS records to propagate.
Step 10. The next step will be configuring SMTP settings for the email account on the WHM side.
To do it, go to WHM >> “Service Configuration” >> “Exim Configuration Manager” >> open the “Advanced Editor” tab. Search for “Section: AUTH” and add the following code inside:sendgrid_login:driver = plaintextpublic_name = LOGINclient_send = : apikey : <API_KEY_VALUE>
Ensure to update <API_KEY_VALUE> with the API Key generated from the step 8.
Step 11. After that, look for “Section: POSTMAILCOUNT” and add the following code there:send_via_sendgrid:driver = manualroutedomains = ! +local_domains.ifdef SRSENABLED# if outbound, and forwarding has been done, use an alternate transporttransport = ${if eq {$local_part@$domain} \{$original_local_part@$original_domain} \{sendgrid_smtp} {sendgrid_forwarded_smtp}}.elsetransport = sendgrid_smtp.endifroute_list = "* smtp.sendgrid.net::587 byname"host_find_failed = deferno_more
Step 12. Look for “Section: TRANSPORTSTART” and add one more code:sendgrid_smtp:driver = smtphosts = smtp.sendgrid.nethosts_require_auth = smtp.sendgrid.nethosts_require_tls = smtp.sendgrid.net
Step 13. Save the SMTP configuration.
Step 14. Send an email to see if the system works. The email header will include the “SendGrid” part.