How to Set Up a Contact Form with Spacemail (Step-by-Step Guide)
Sometimes visitors to your website may want to reach out with questions, collaboration requests, or feedback. A contact form is a secure, user-friendly way for visitors to reach a site owner or business directly through the website. When someone fills out the form, their message is sent to your Spacemail mailbox, just like a regular email.
Setting up a contact form usually involves two parts:
Creating the form on your site so visitors can submit their message
Configuring SMTP so Spacemail can deliver those form submissions to your inbox safely and reliably
You can set one up on a site built with a content management system (CMS), such as WordPress, or integrate it using a custom script.
Contact Form in WordPress
If your website is built with WordPress, use plugins to set up a contact form. Essentially, you will need to create the form itself and configure SMTP Authentication for your mailbox to enable email delivery from your website. We recommend using Contact Form 7 and GoSMTP (GoSMTP Pro) plugins.
Alternative plugins: Formidable Forms, Ninja Forms, WPForms instead of Contact Form 7, and WP Mail SMTP instead of GoSMTP/GoSMTP Pro.
Step 1. Install plugins for your Contact Form
Log in to your WordPress Dashboard.
Go to Plugins > Add New.
Search for the Contact Form 7 plugin.
Click Install Now, then Activate.
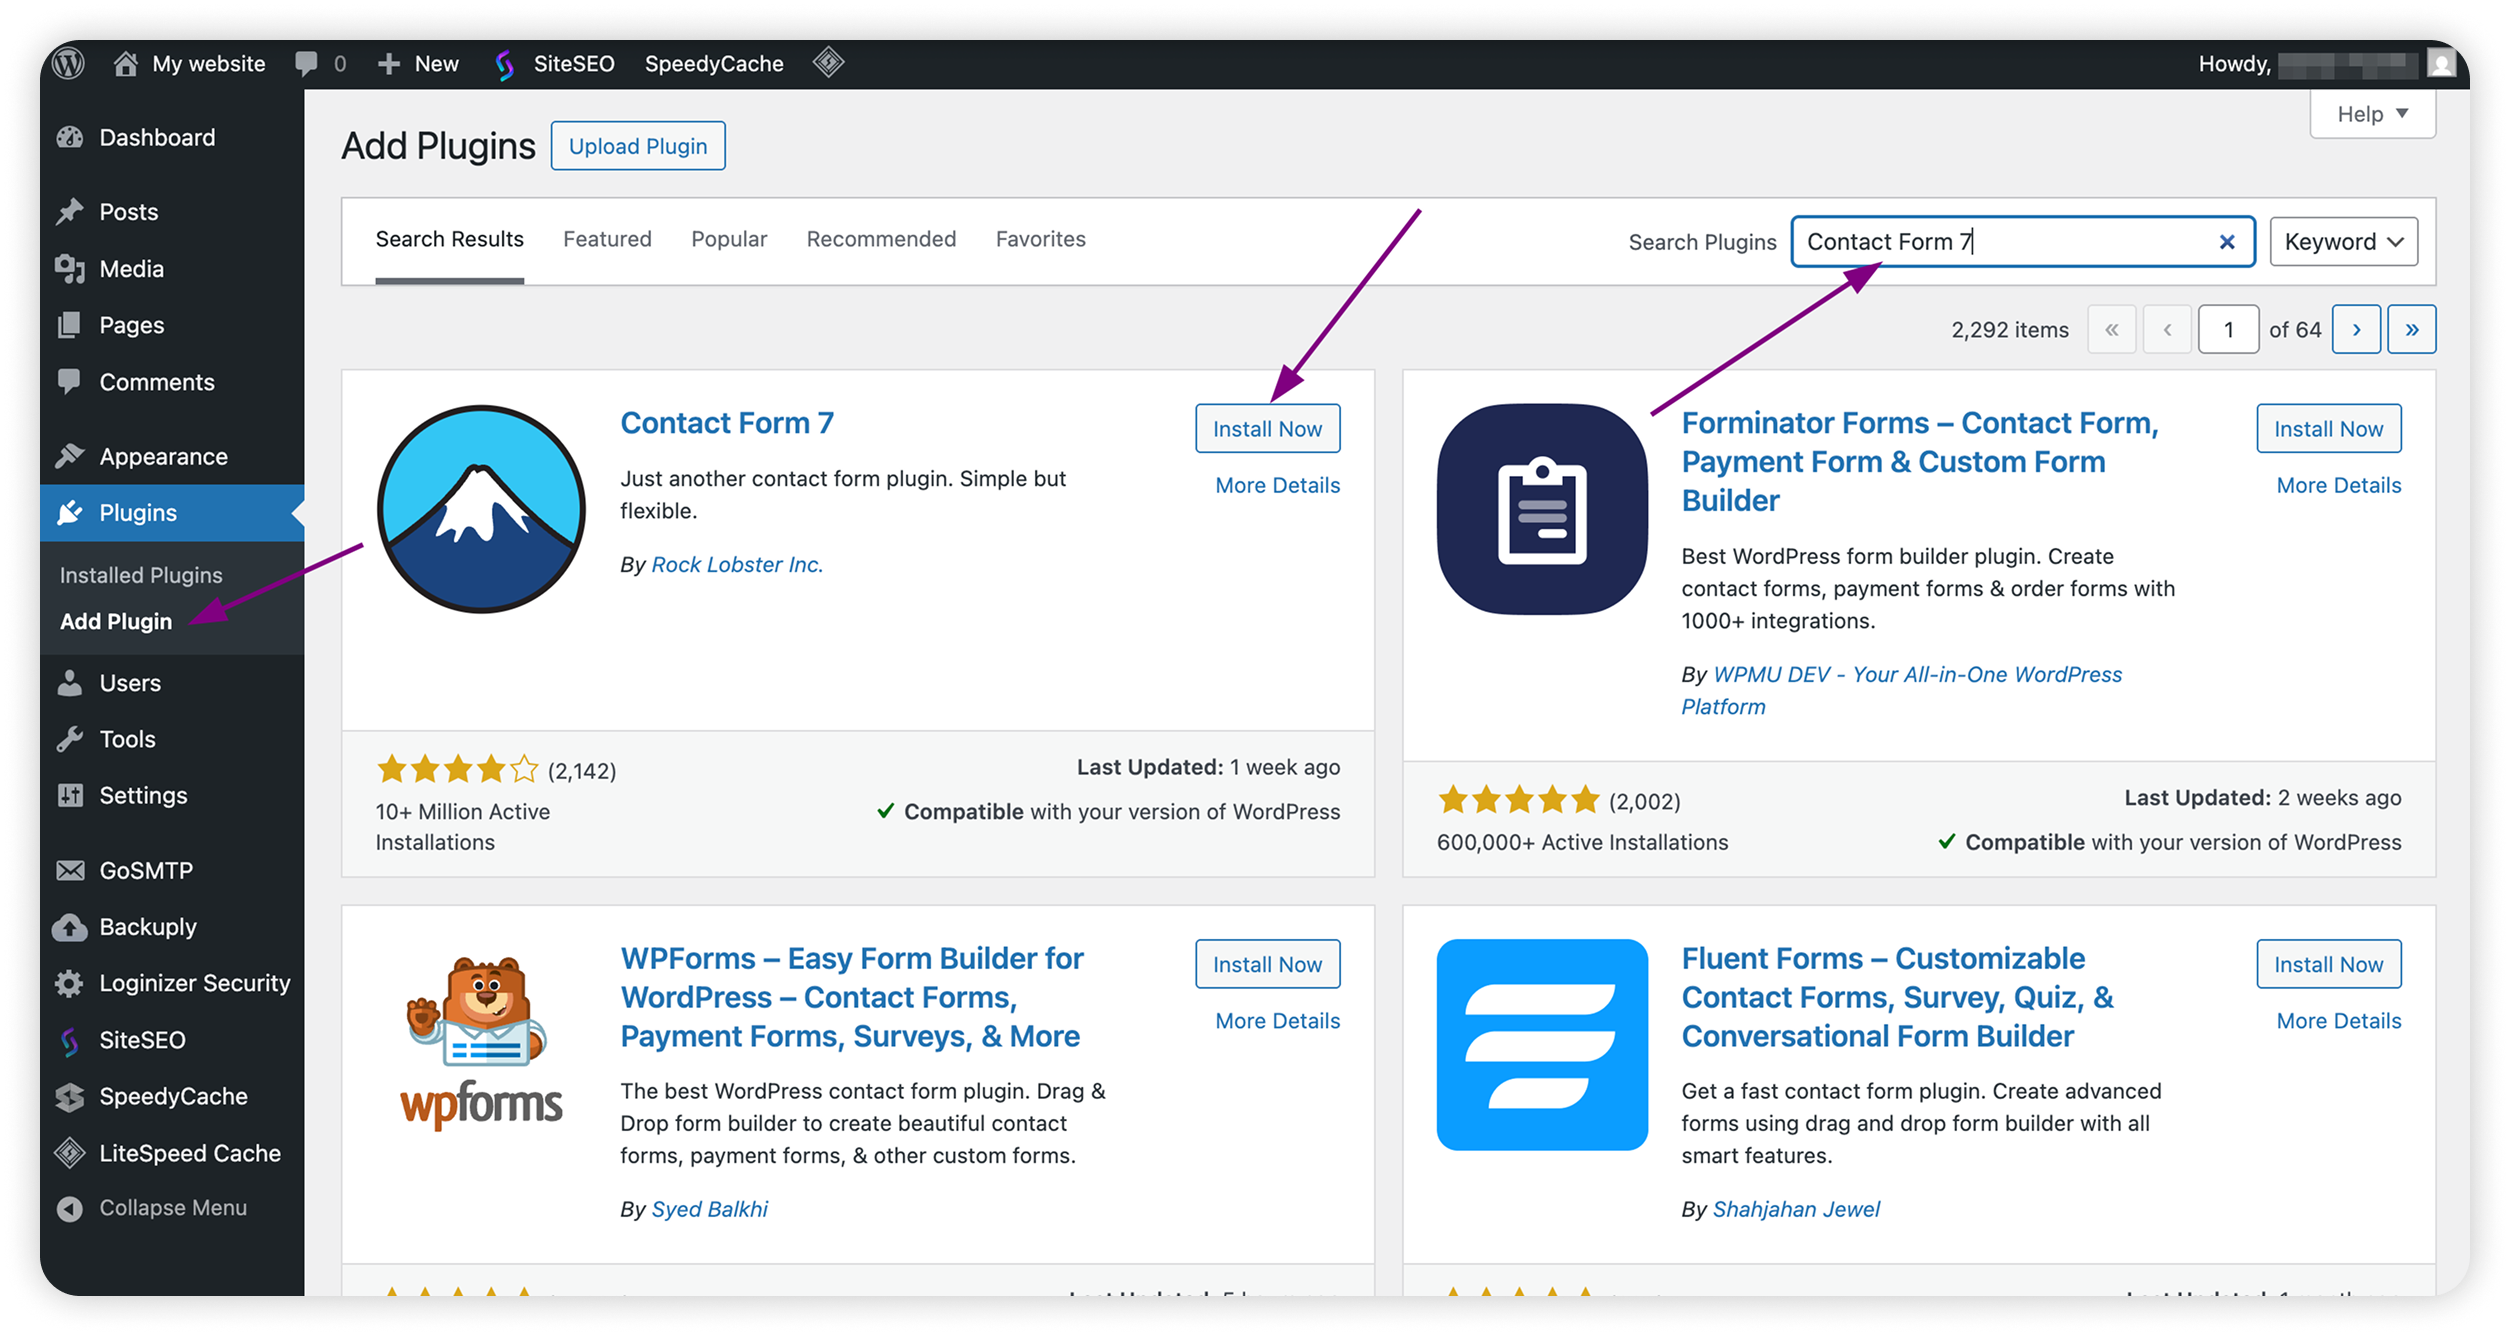
Repeat the same steps for the GoSMTP or GoSMTP Pro plugin if it hasn’t been installed yet.
Step 2. Create a New Form
Go to Contact > Add Contact Form.
Give your form a name (e.g., Contact Us).
Use the default form template or customise it based on your needs.
Note: By default, Contact Form 7 uses the site admin’s email in the To field.
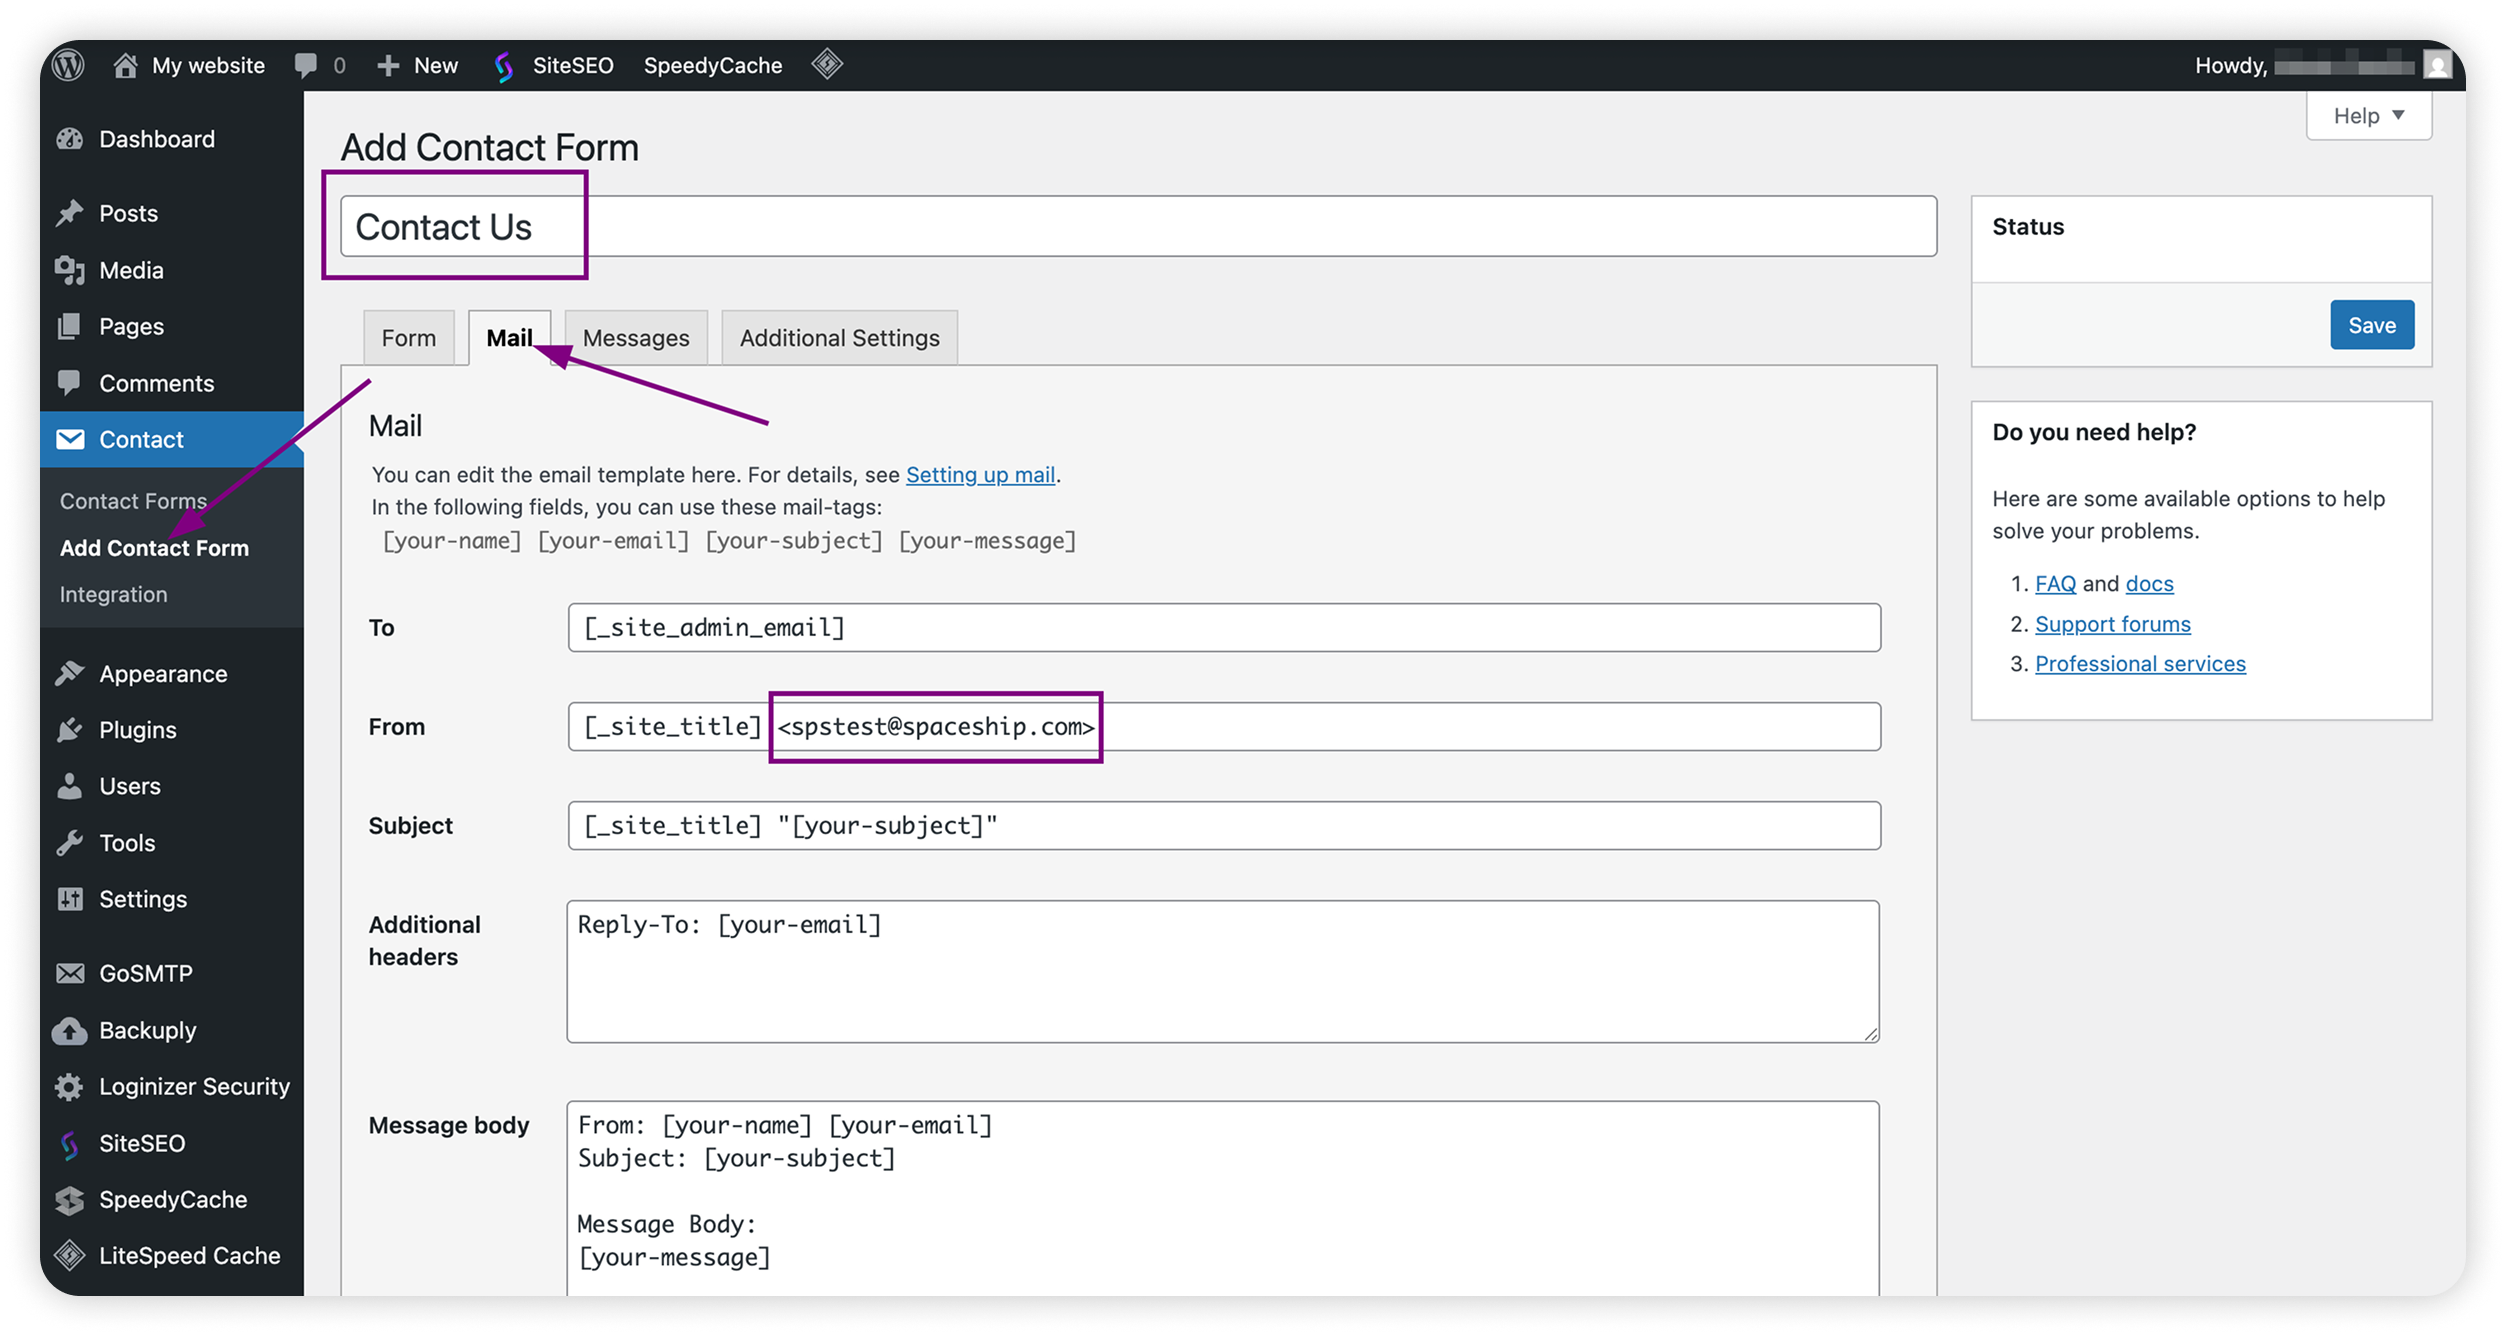
Click Save.
Then, copy the shortcode displayed at the top of the form editor (it looks like
[contact-form-7 id="123" title="Contact Us"]).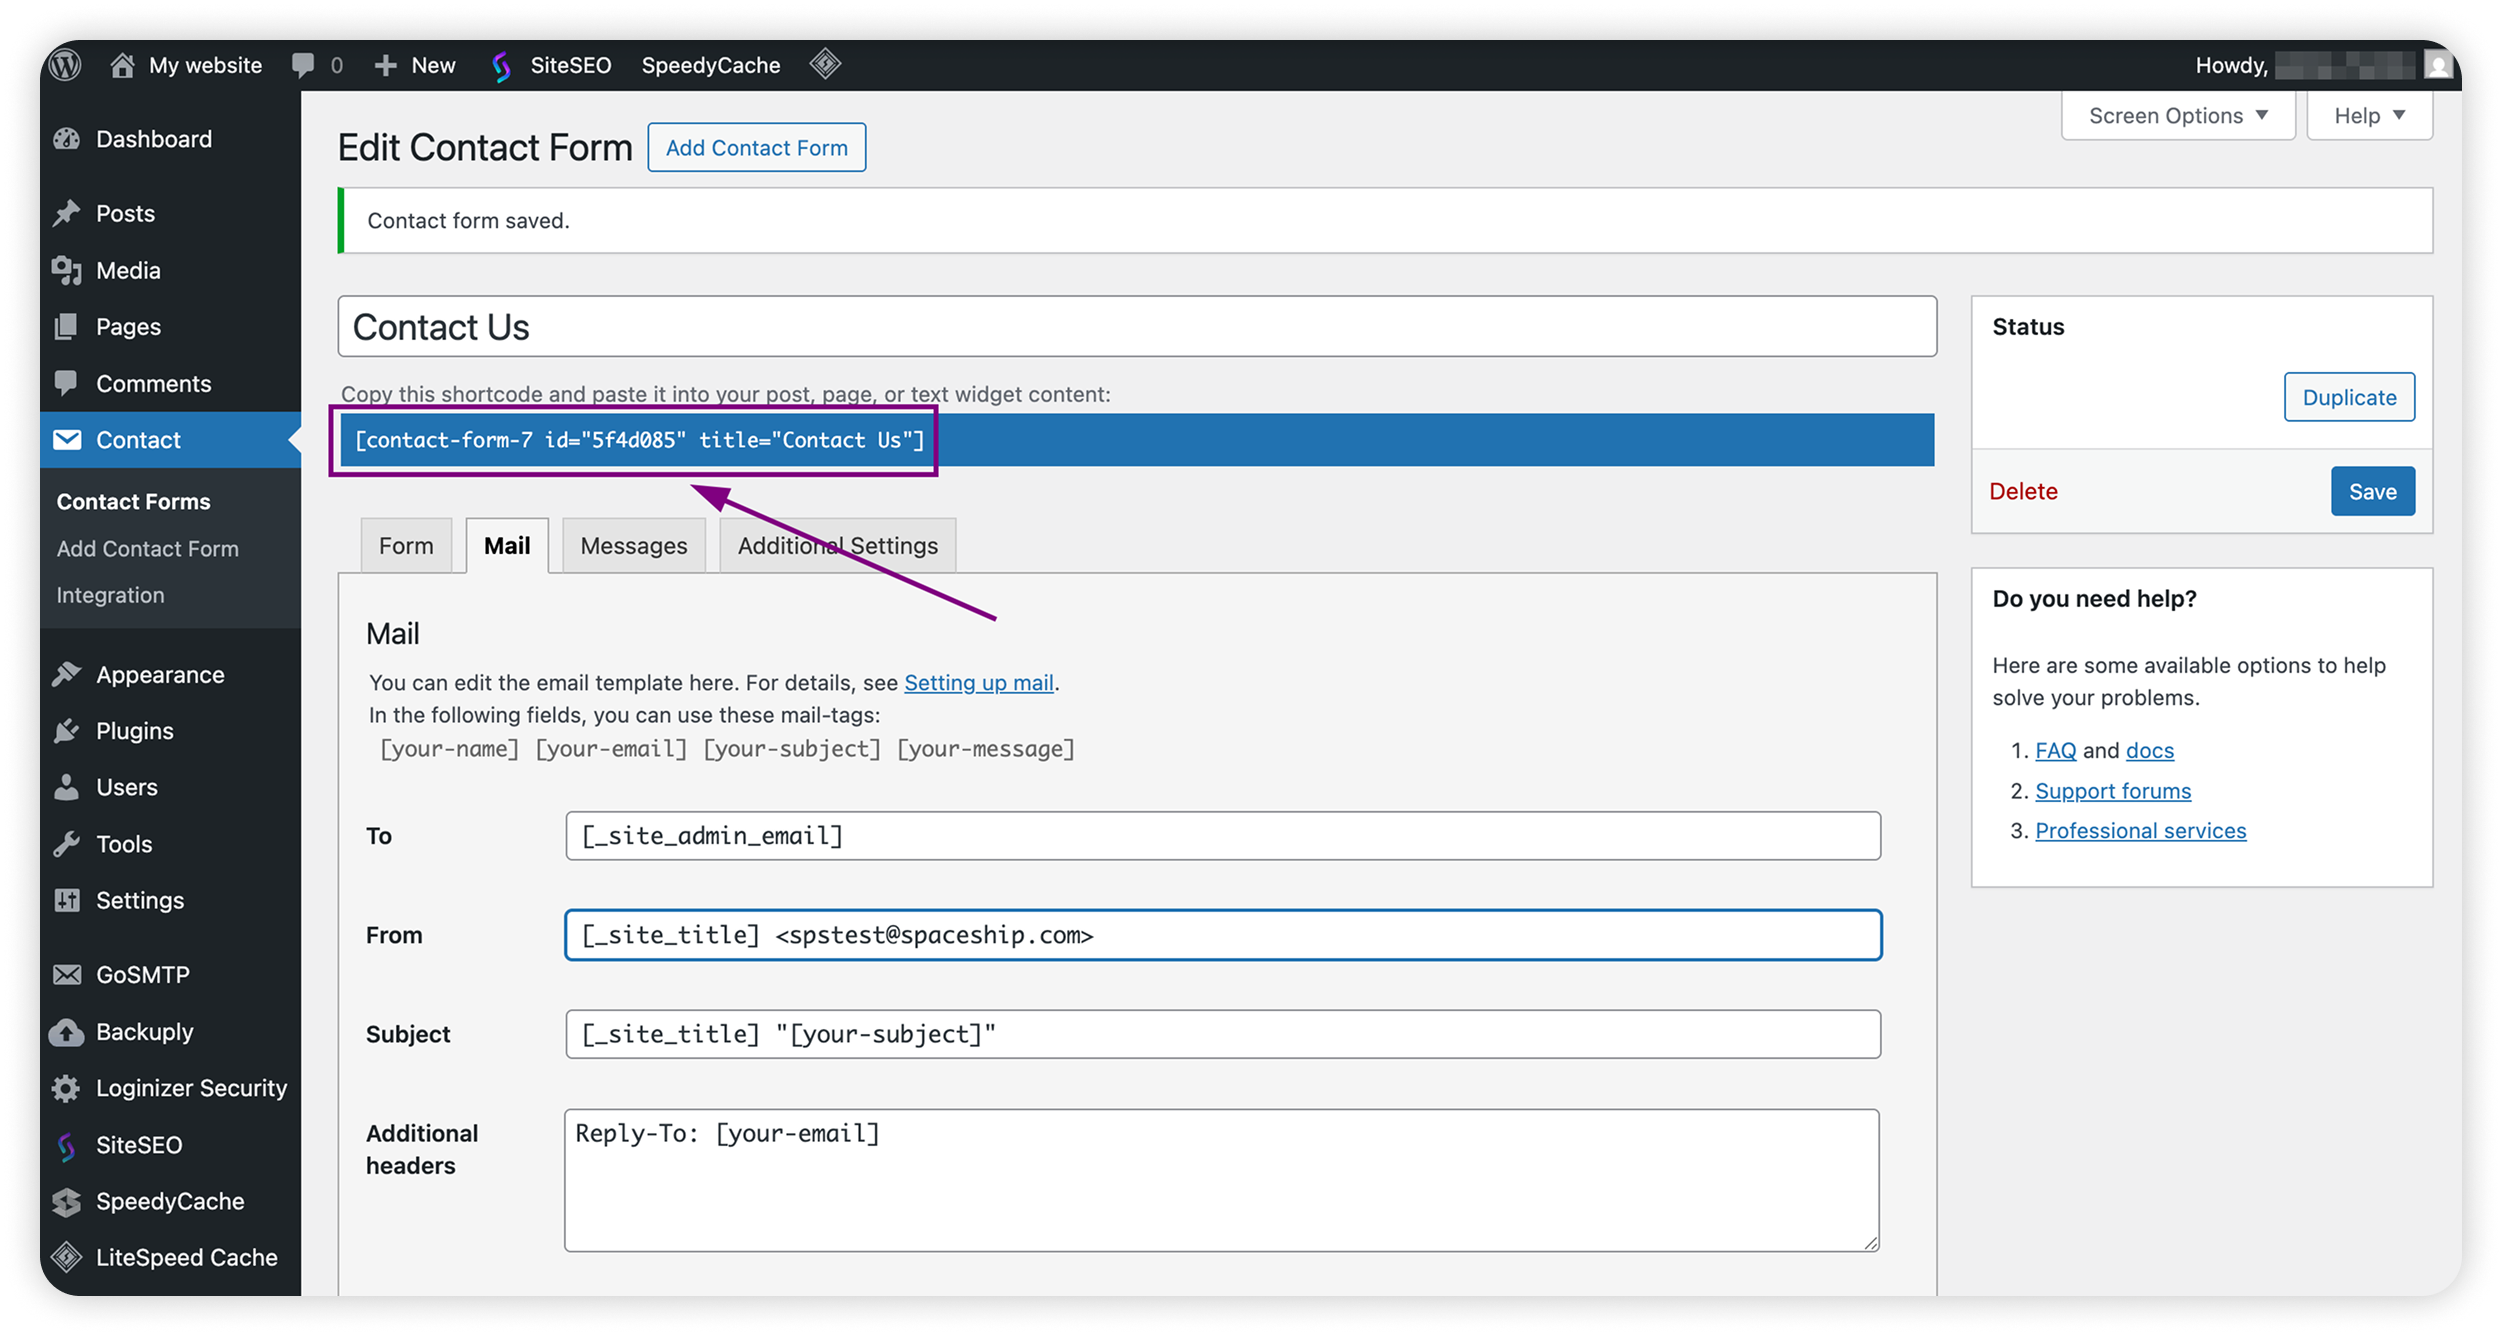
Step 3. Add the Form to a page
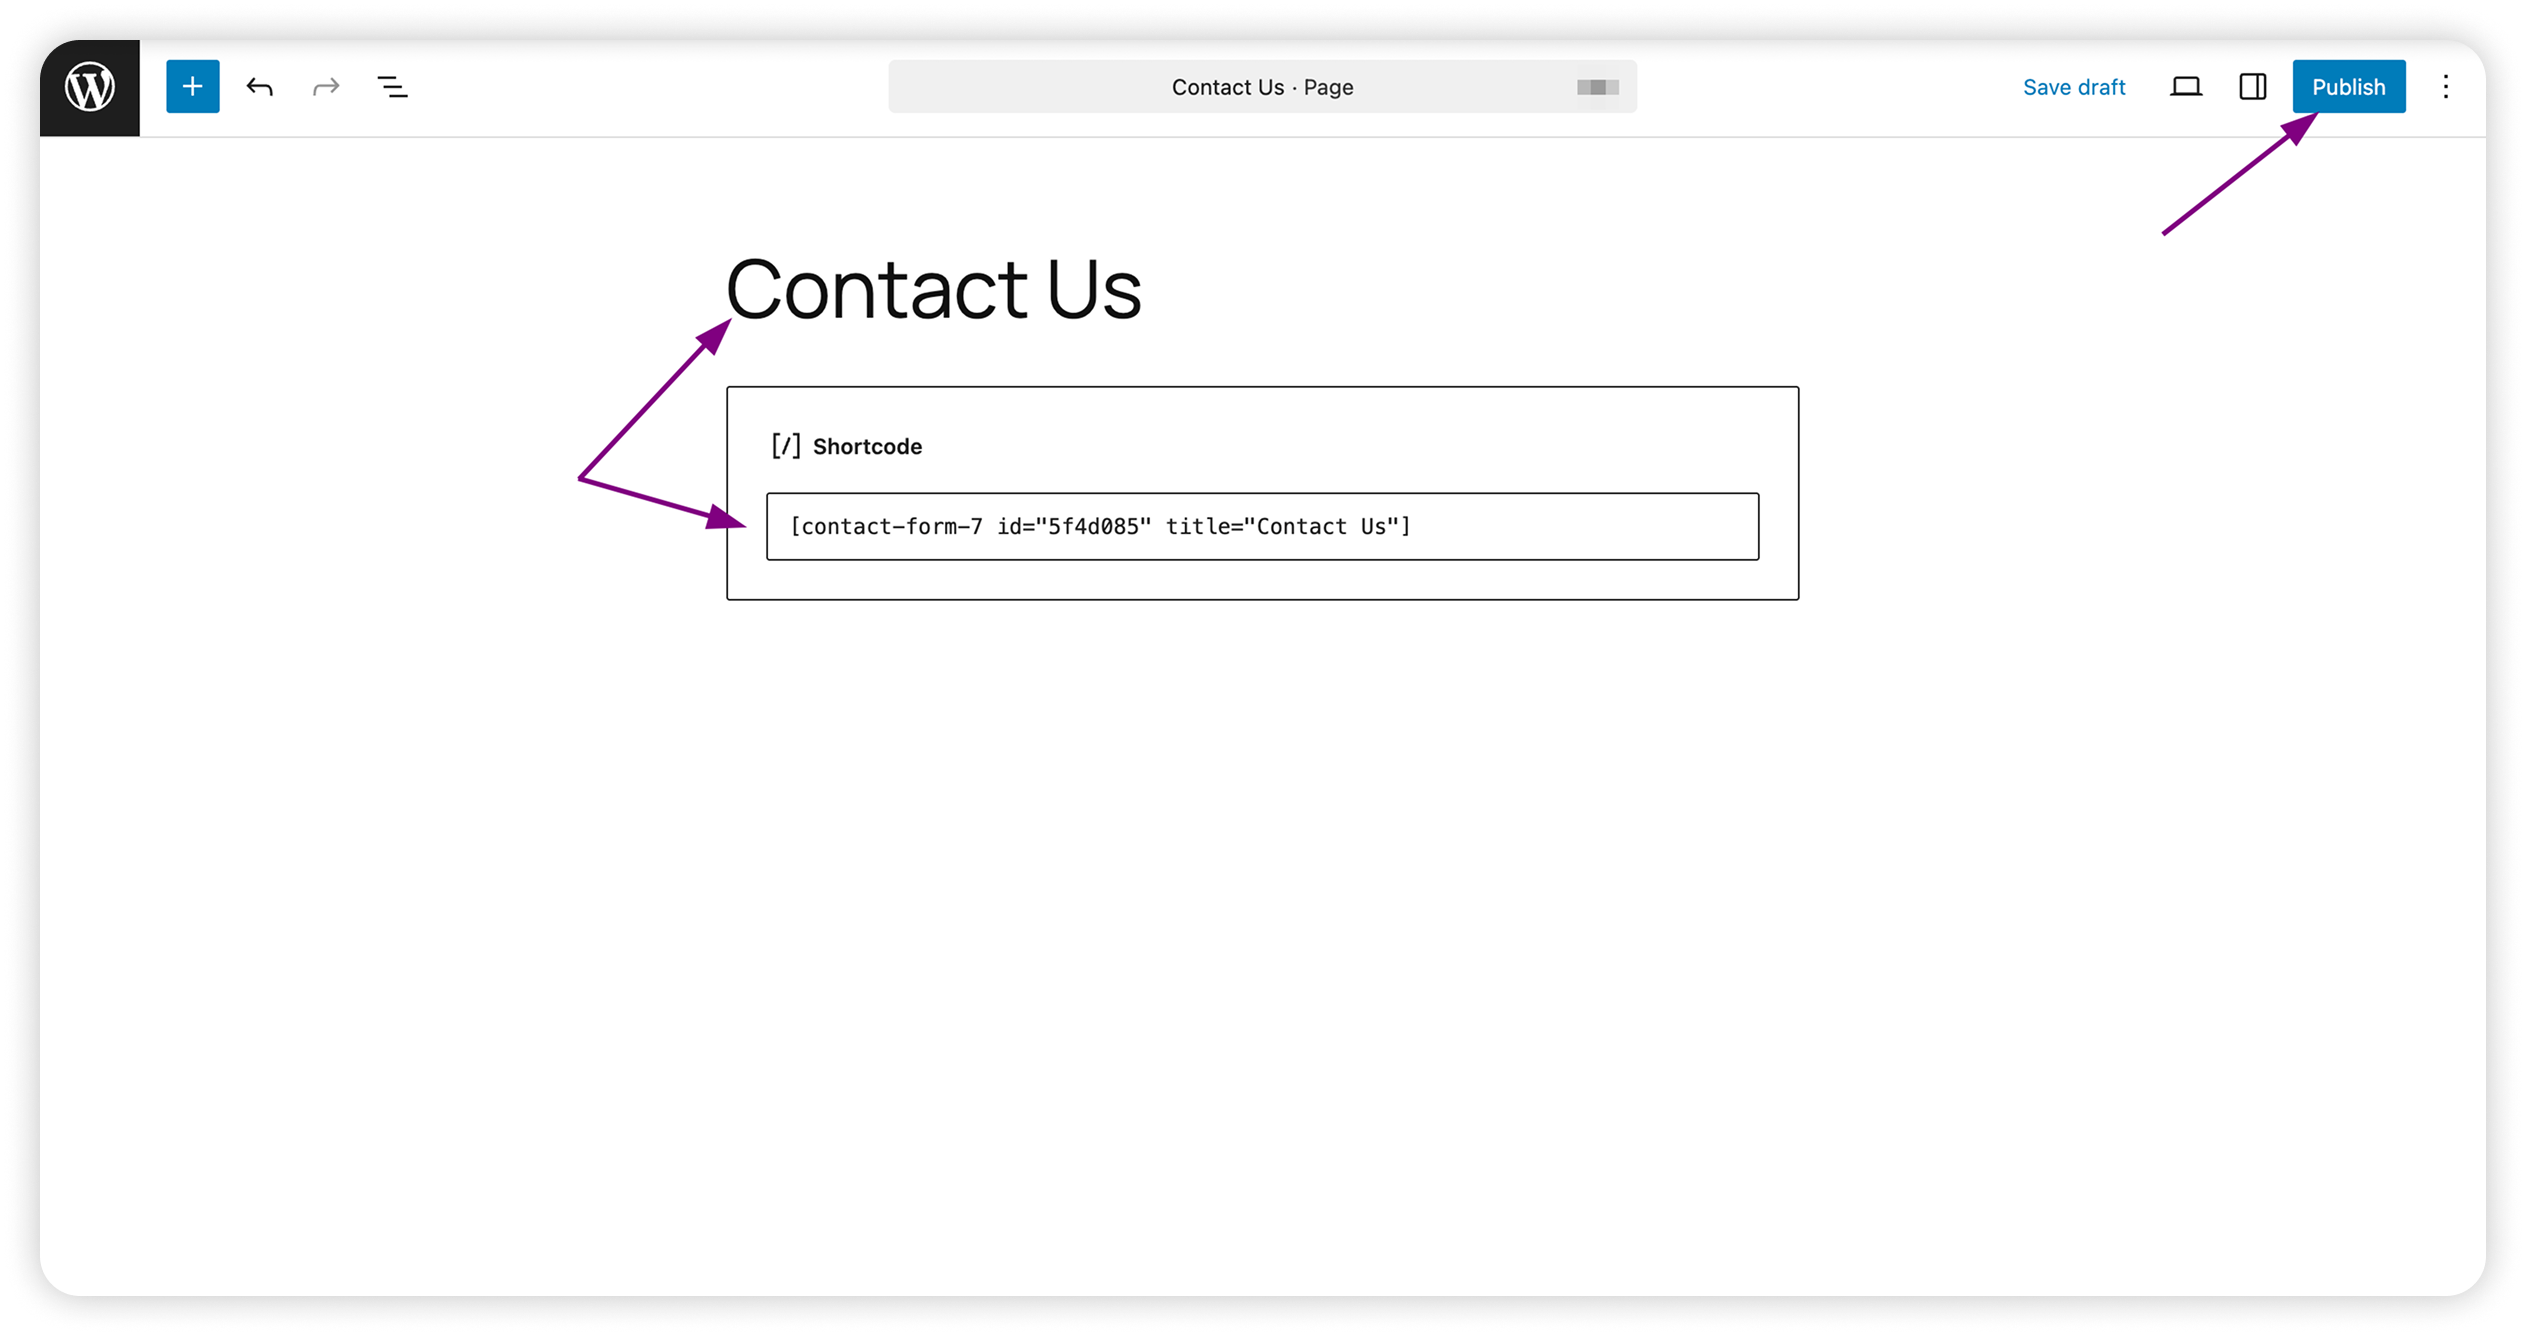
Go to Pages > Add New.
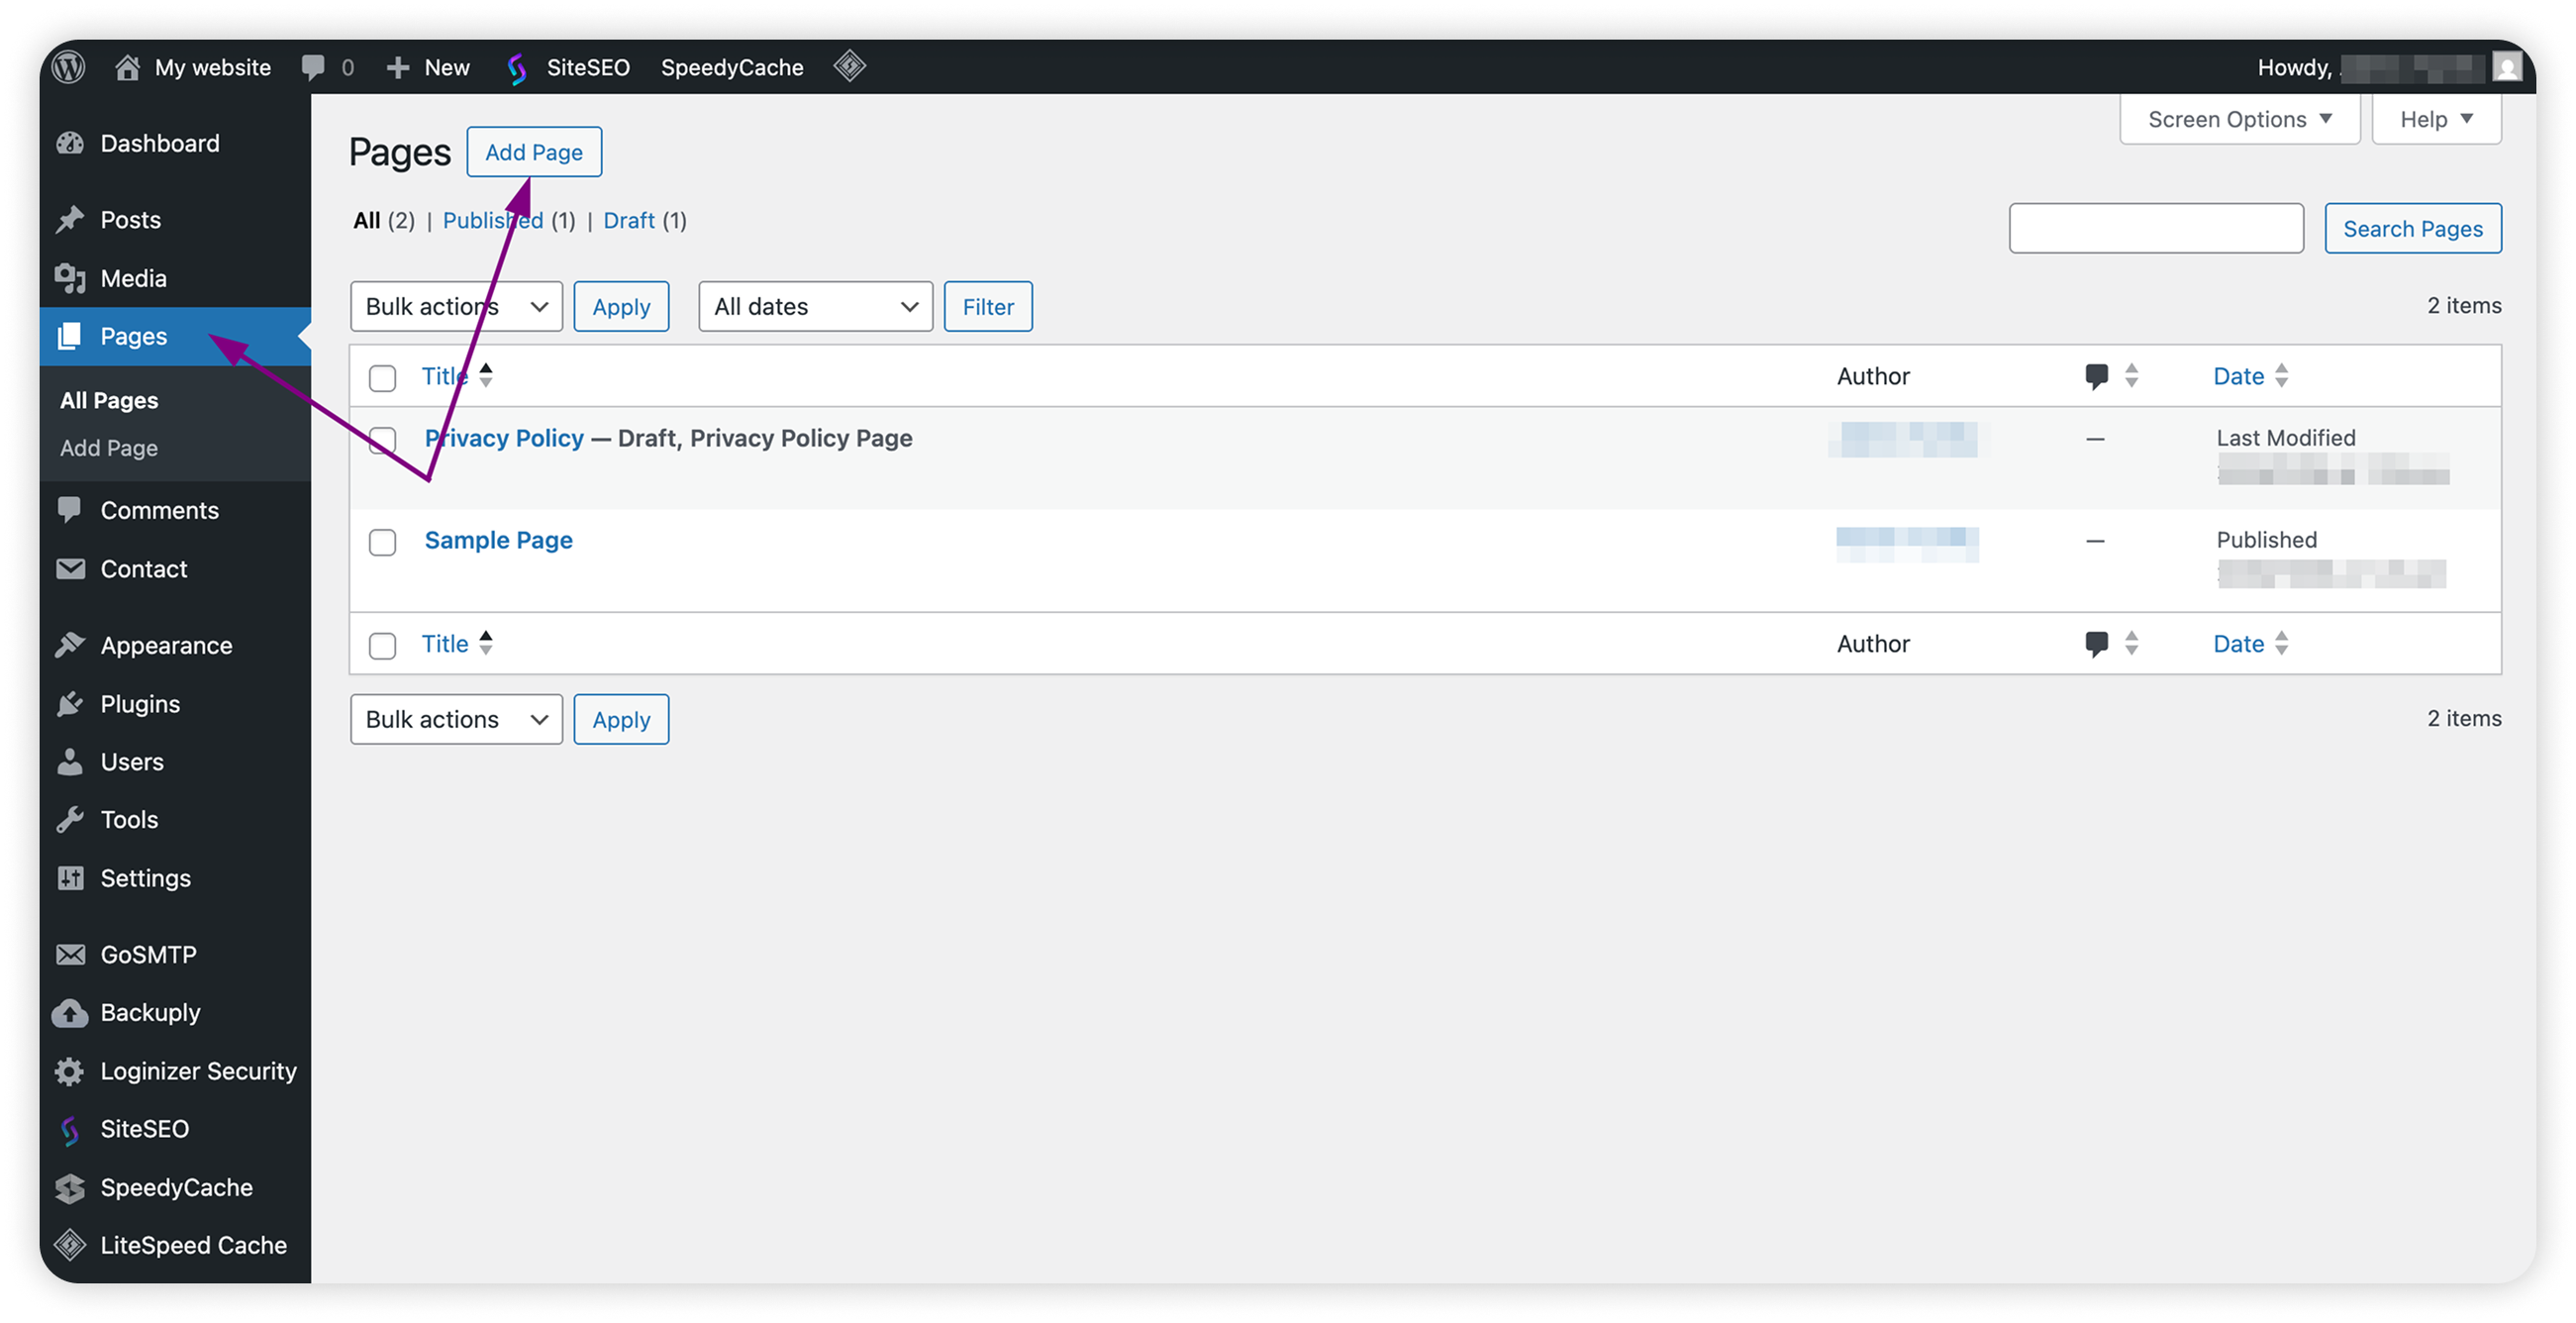
Alternatively, you can Edit the existing Contact page.Paste the Contact Form 7 shortcode into the page editor.
Click Publish.
Step 4. Update the website admin’s email
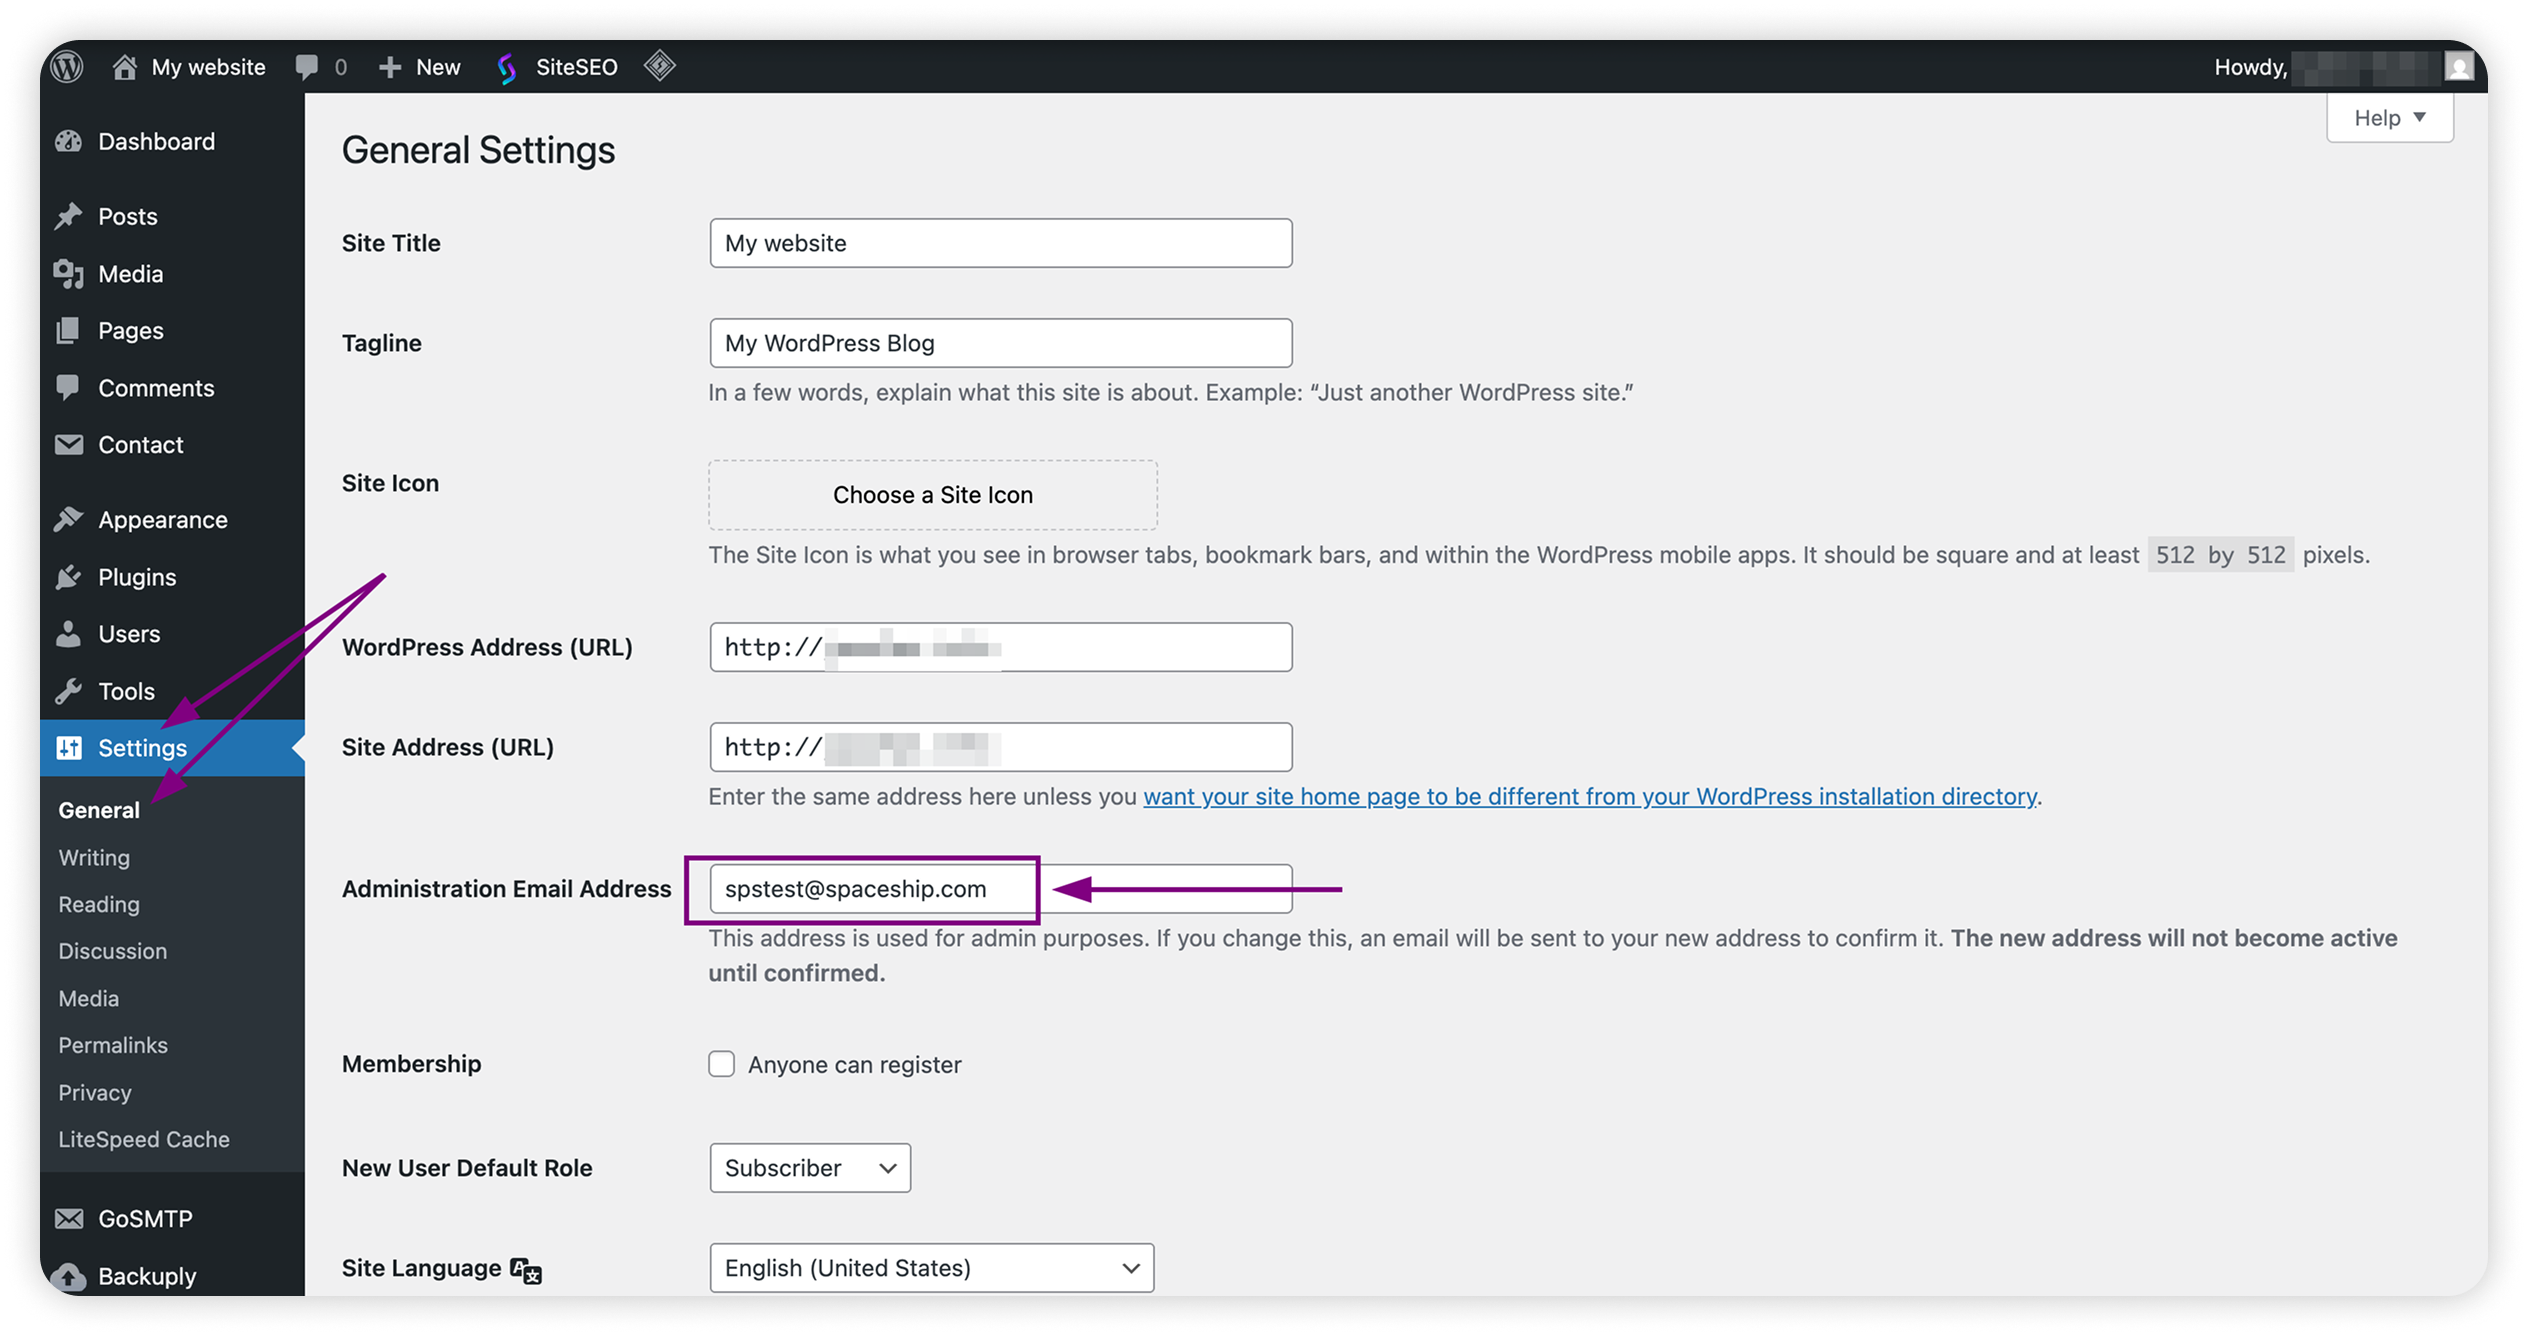
Go to Settings > General
Locate the Administration Email Address field.
Ensure your mailbox created with Spacemail is used as the admin email address for your WordPress website.
Step 5. Configure GoSMTP/GpSMTP Pro to use Spacemail
Go to GoSMTP > Settings.
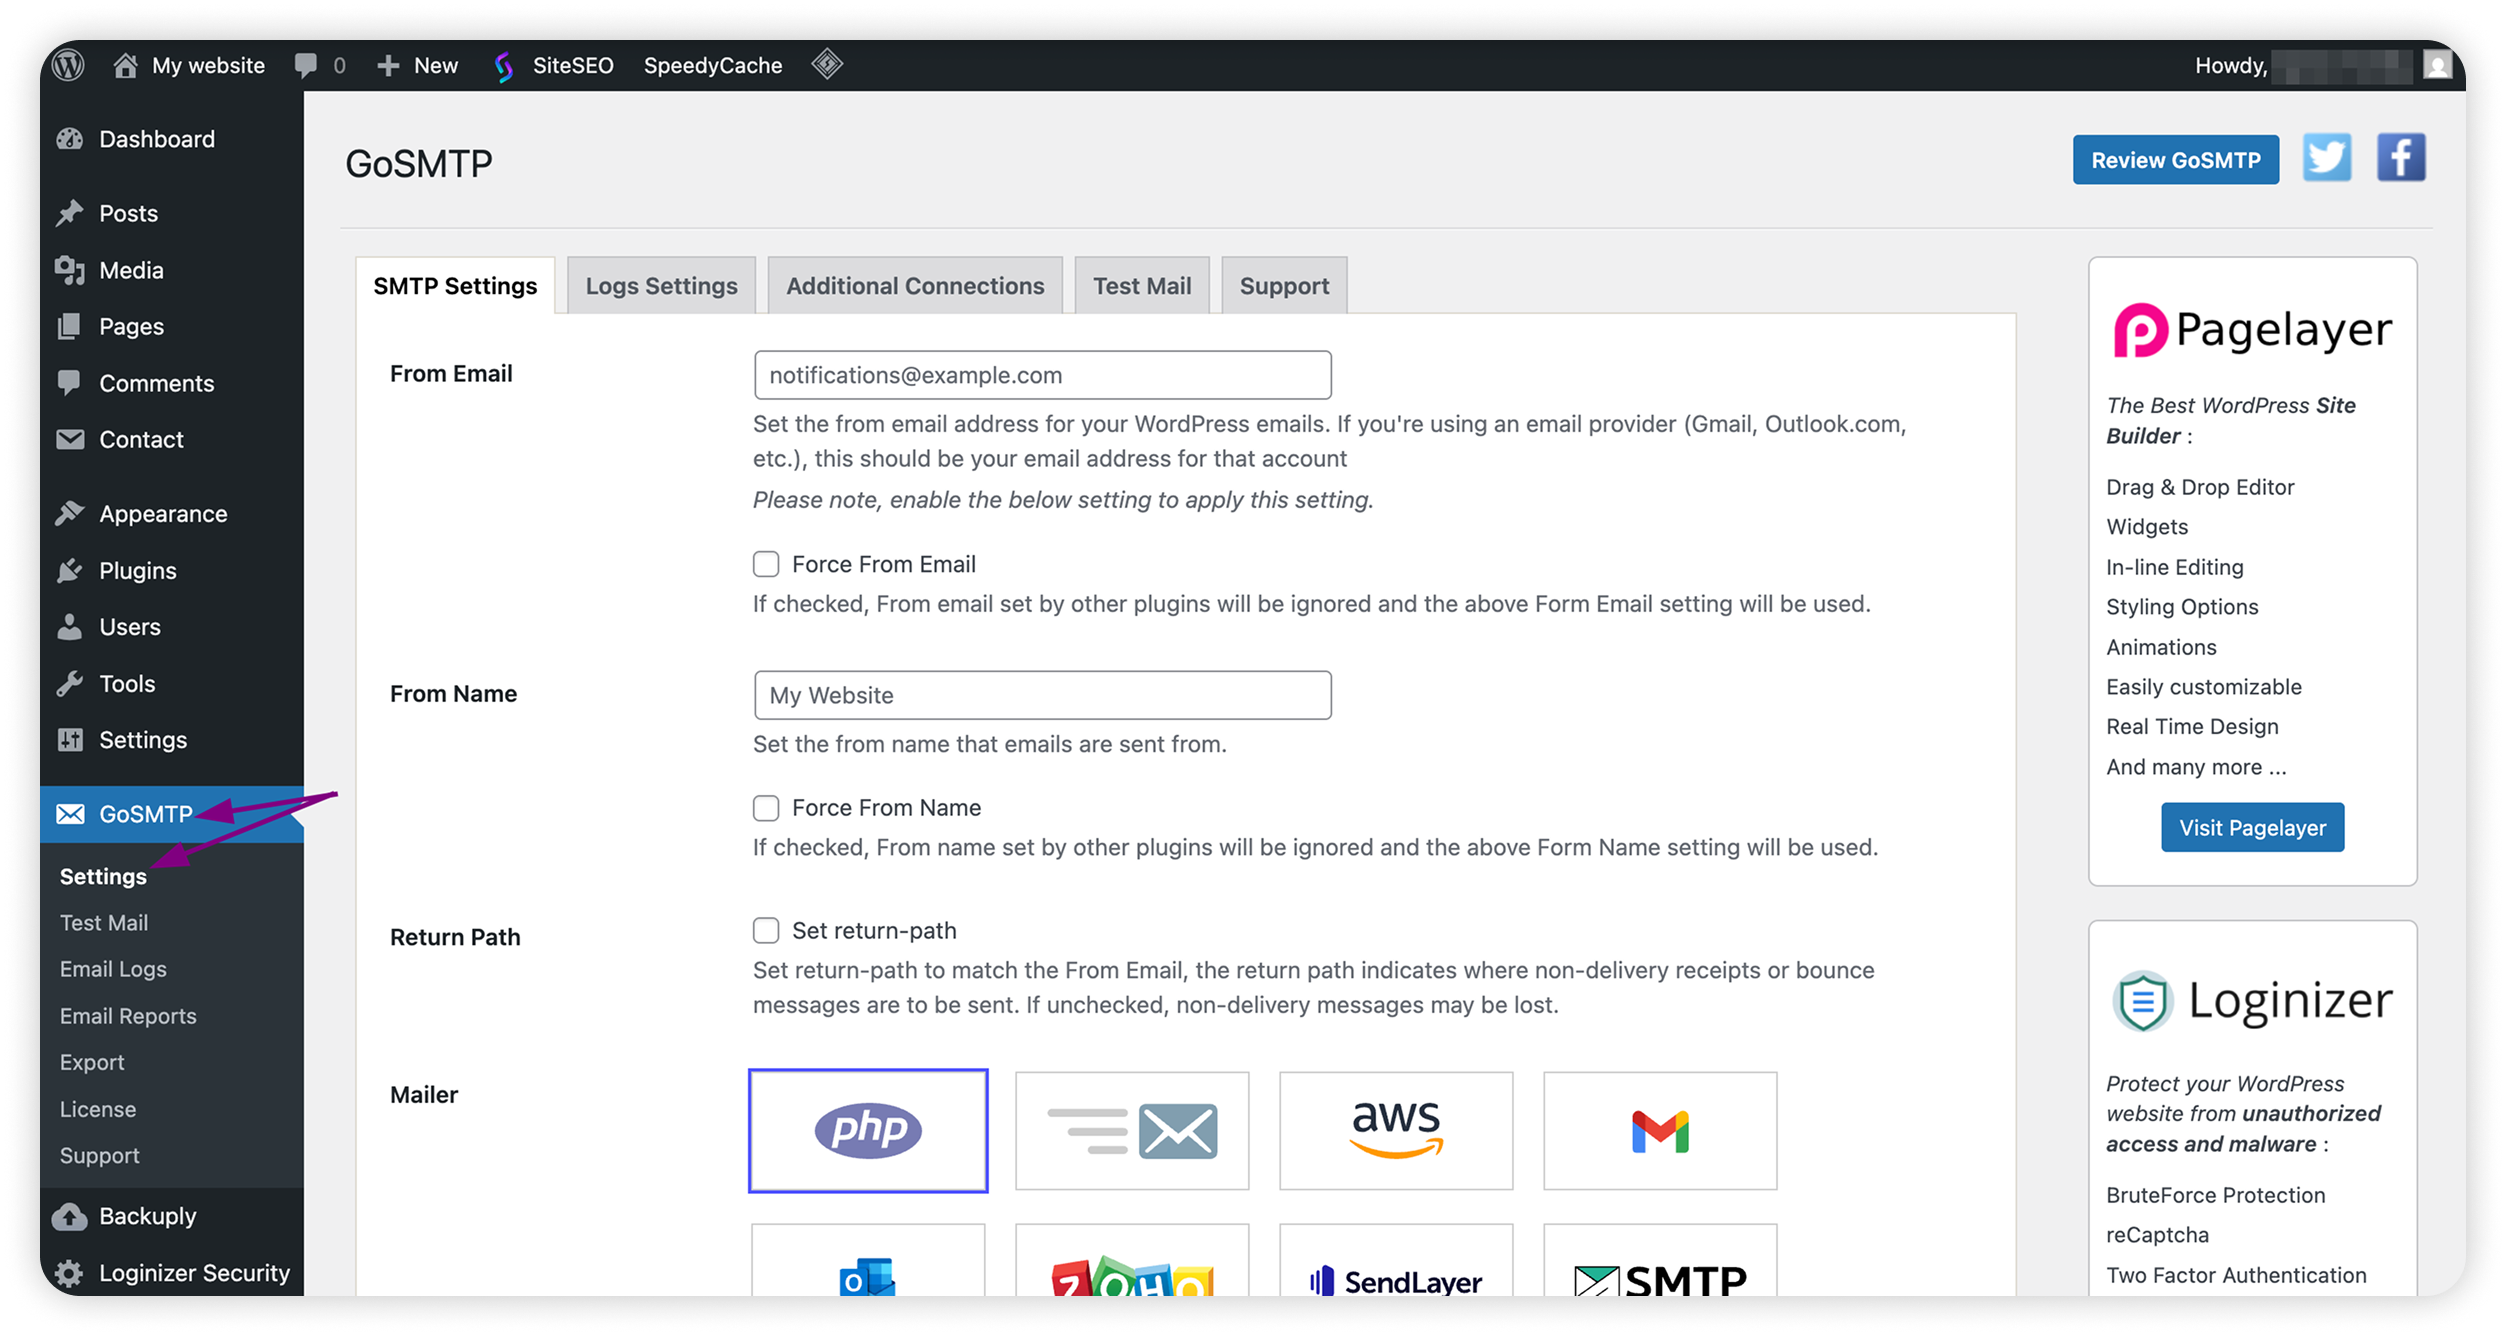
Fill in the following details:
From Email: the Spacemail mailbox that will be used for sending emails
Note: the emails submitted via the Contact Form will be sent from this email address.
We recommend keeping Force From Email checked.
From Name: the display name that appears as the sender
Note: the From Name can be your business or website name (“My Website Contact Form” or “Support Team”), so it is clear that emails are from your website.
We recommend keeping Force From Name checked.
Return Path: should be checked.
Mailer: Other SMTP
SMTP Host: mail.spacemail.com
Type of Encryption: SSL
SMTP Port: 465
SMTP Authentication: Yes
SMTP Username: your Spacemail mailbox, e.g., info@yourdomain.com
SMTP Password: the password for this mailbox
Click Save Changes.
Step 6. Send a Test Email
GoSMTP > Settings
Go to the Test Email tab, send a test message to another mailbox you own, and check if it arrives successfully.
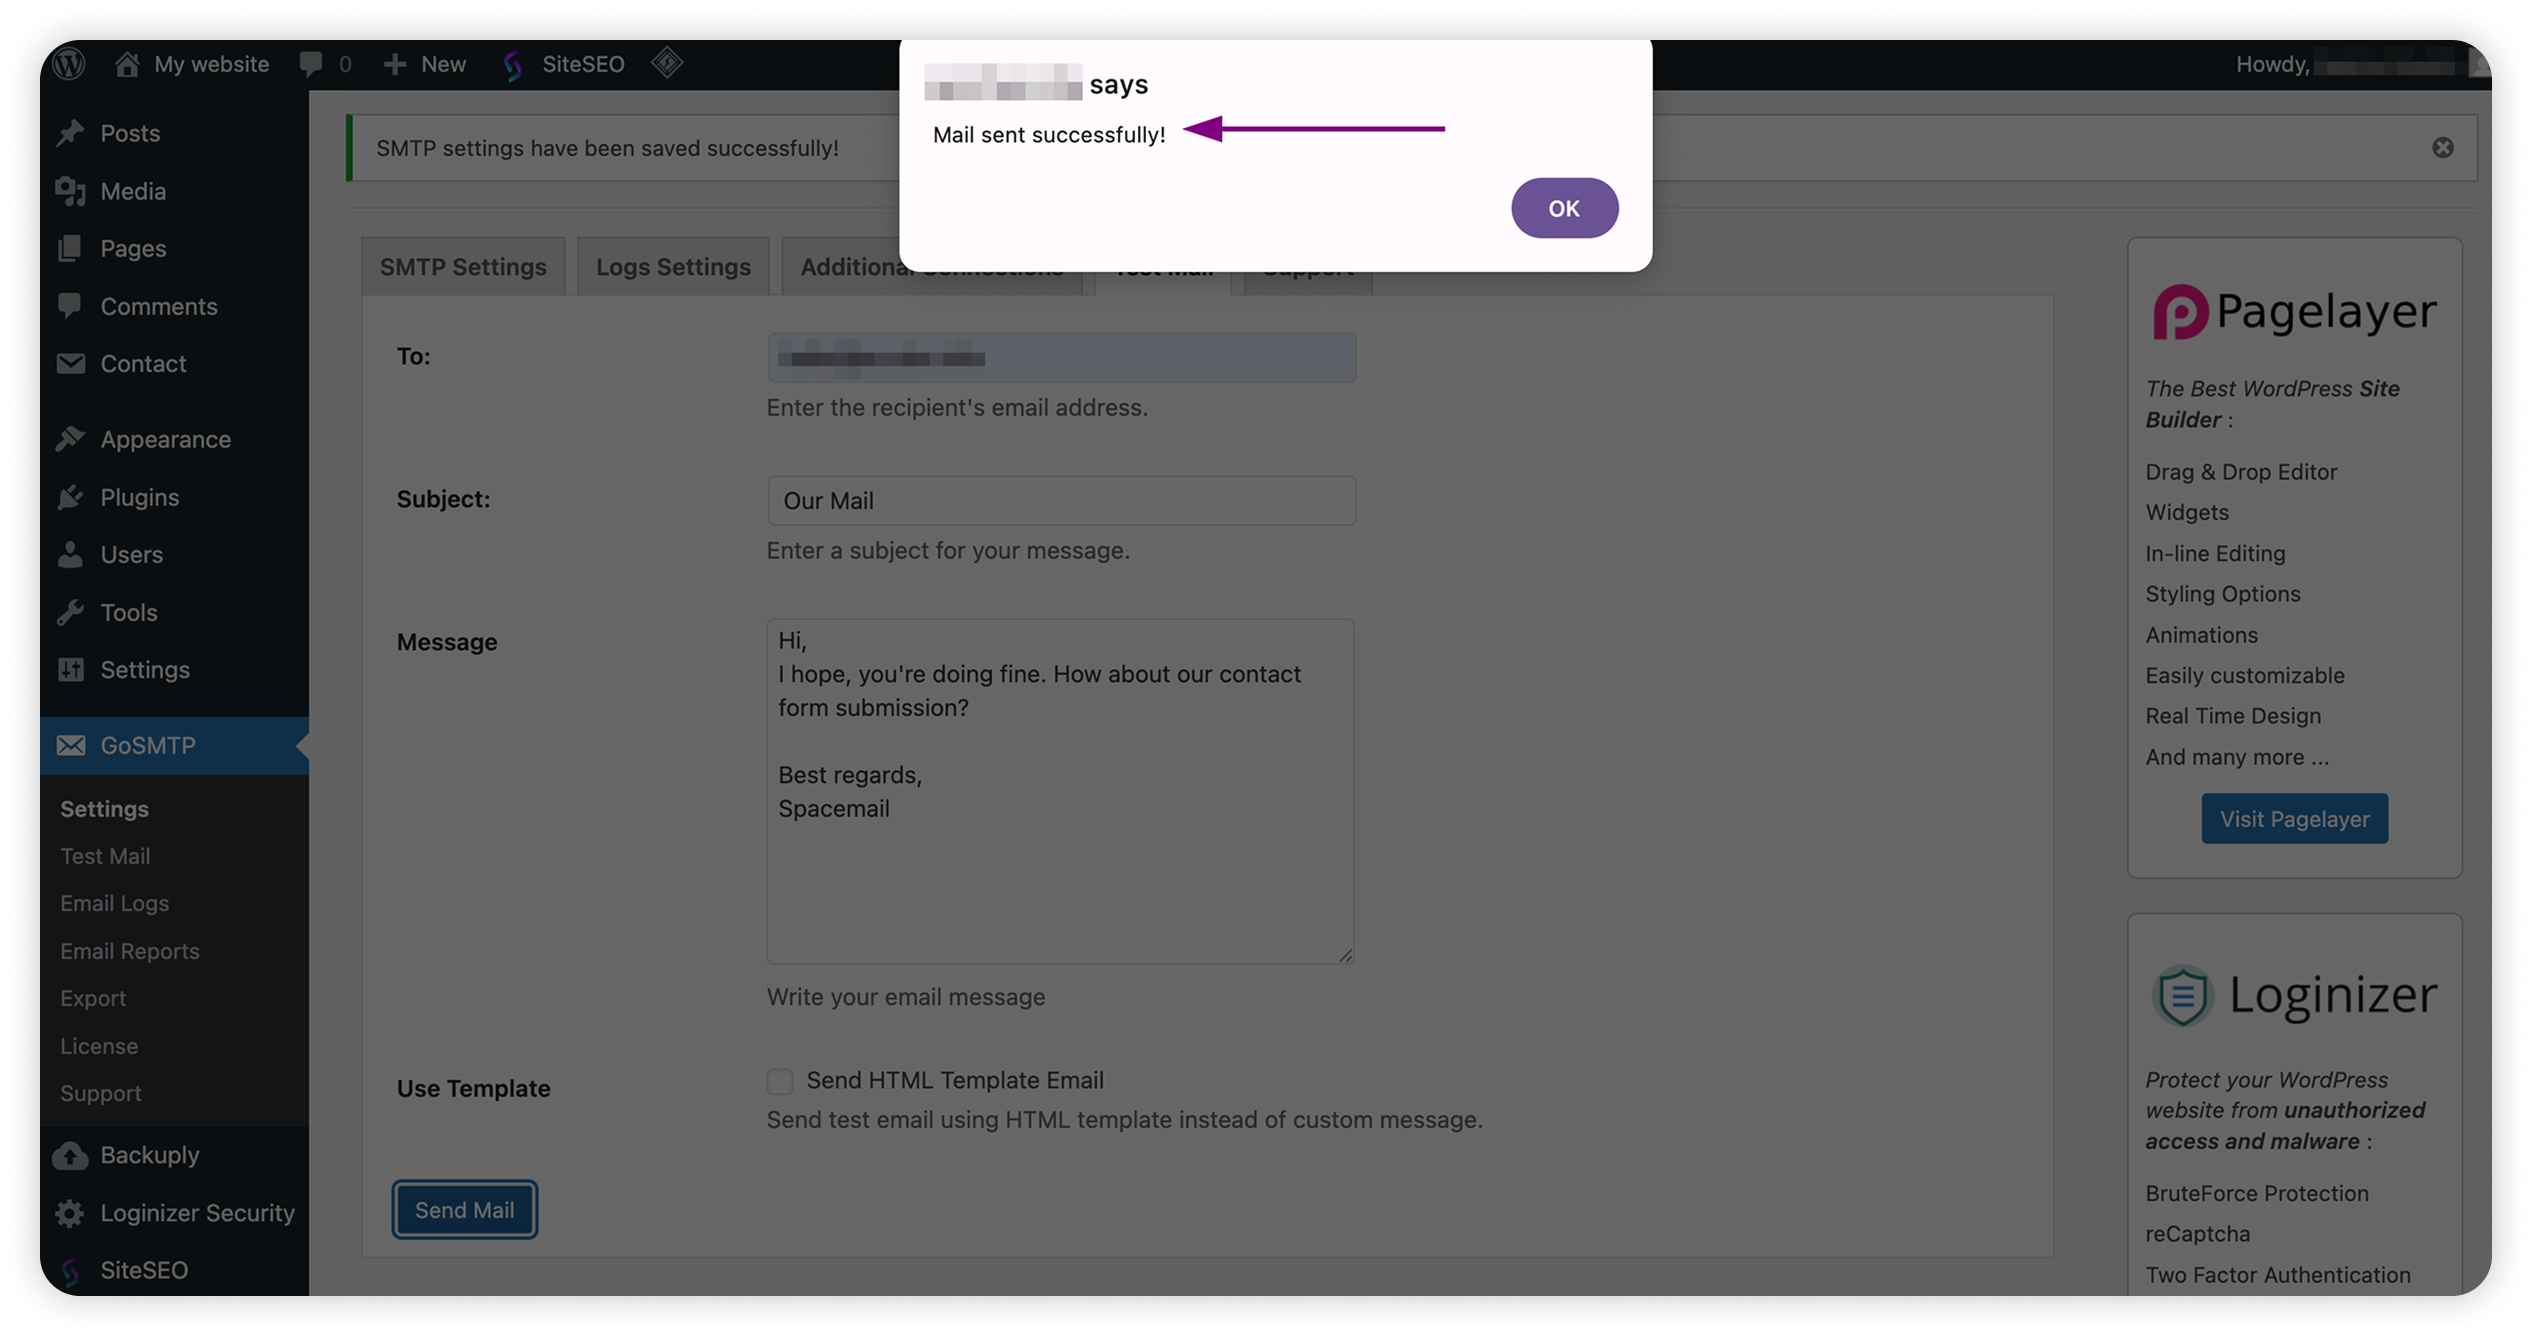
If it does, visitors can start sending their submissions via the contact form.
Contact Form in a third-party script
You can still add a contact form to your website using a custom script or a third-party application. All you need to do is configure SMTP for your mailbox to enable email delivery. By setting up SMTP authentication, you ensure your messages are sent securely and reliably, just like from your regular email account.
SMTP details to use:
From Email: the Spacemail mailbox that will be used for sending emails
From Name: the display name that appears as the sender
To: the email address email submissions should be delivered to; usually the same as From Email
Return-Path: the same as From Email, used to receive bounce-back emails
SMTP Host: mail.spacemail.com
SMTP Port: 465
Encryption: SSL
Authentication: true
SMTP Username: your Spacemail mailbox, e.g., info@yourdomain.com
SMTP Password: the password for this mailbox
That's it!