How to set up Spacemail DNS records on Squarespace nameservers
If your domain is pointed to Squarespace nameservers (dns1.p06.nsone.net, dns2.p06.nsone.net, dns3.p06.nsone.net, dns4.p06.nsone.net), follow these steps to set up the DNS records needed for Spacemail.
Step 1. Log in to your Squarespace account.
Step 2. Go to the Domains tab and click on your domain.
Step 3. Click the Manage Domain Settings button:
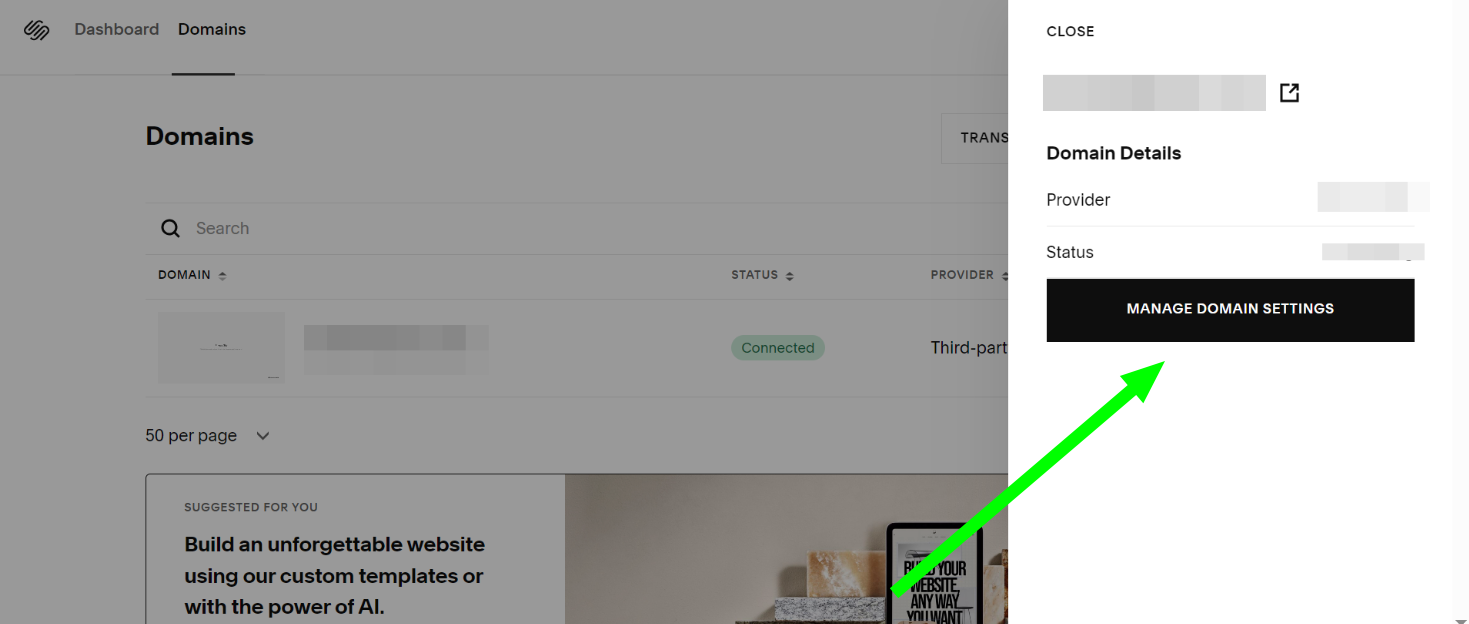
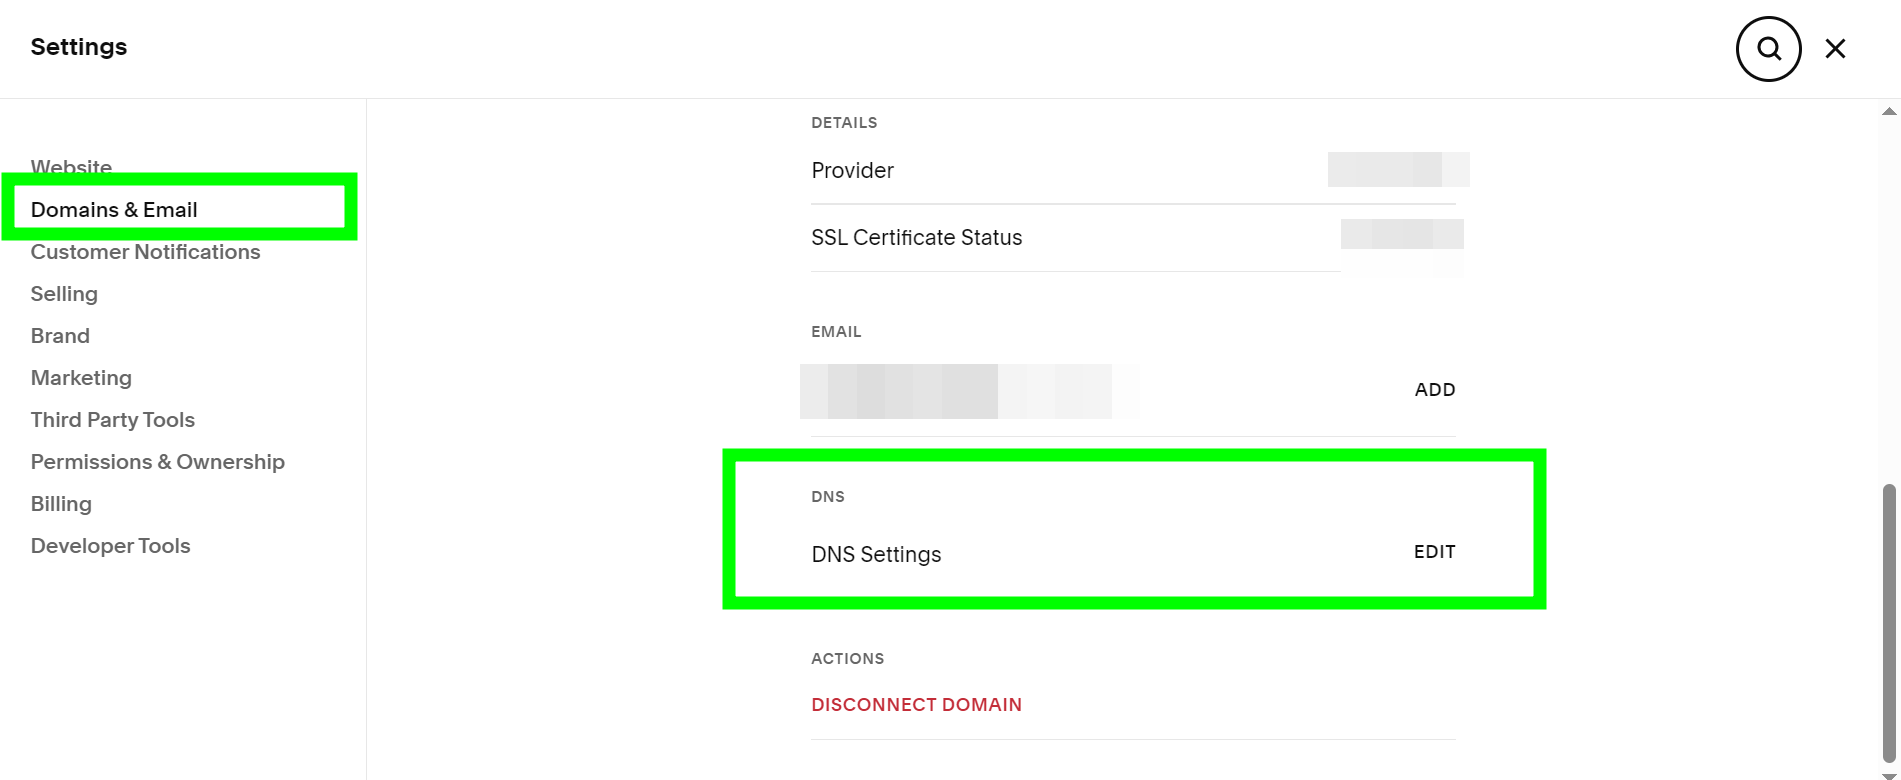
Step 4. Go to the Domains & Email section, scroll the page, and locate the DNS Settings field. Once done, click on the Edit button:
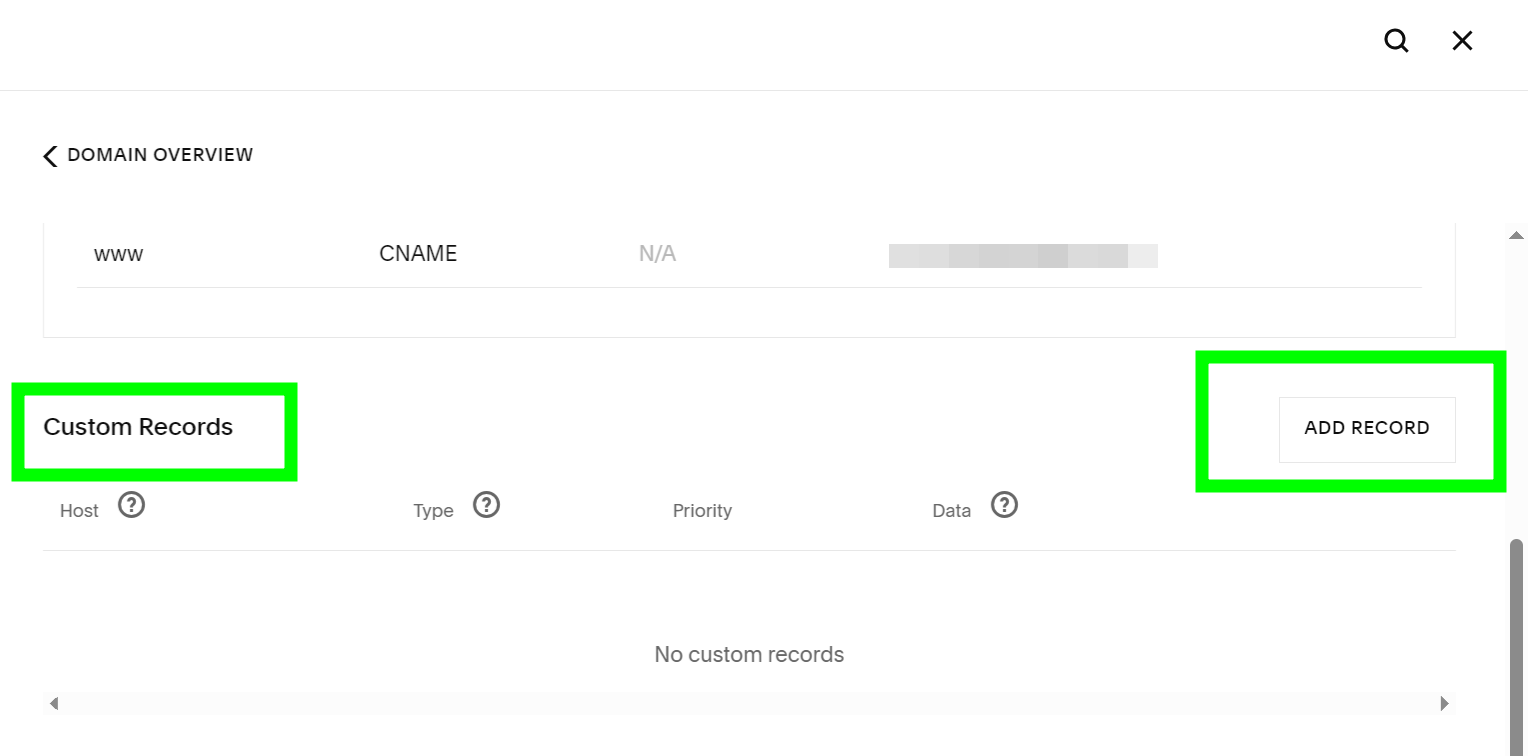
Step 5. In the Custom Records field, click on the Add Record button:
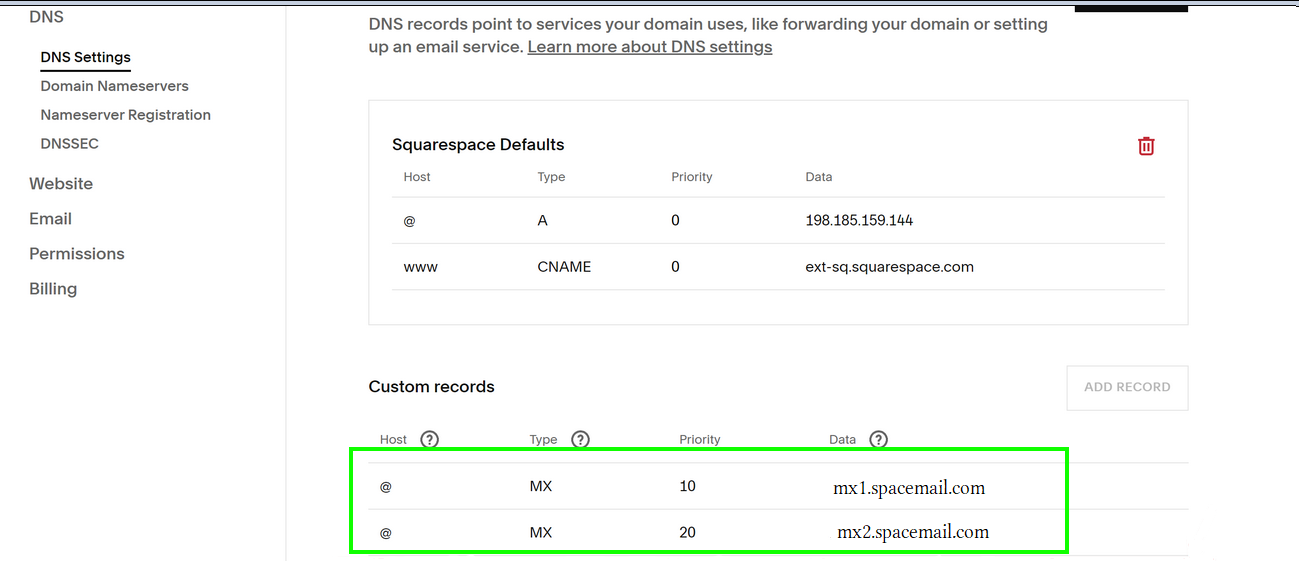
Step 6. Create the following records:
Host: @ | Type: MX | Priority: 0 | Data: mx1.spacemail.com
Host: @ | Type: MX | Priority: 0 | Data: mx2.spacemail.com
Step 7. Next, we'll need to add SPF, DKIM, and DMARC records. The SPF (Sender Policy Framework) DNS record helps protect your domain from email forgery and impersonation by preventing spammers from sending emails on your behalf.
Host: @ | Type: TXT | Data: v=spf1 include:spf.spacemail.com ~all
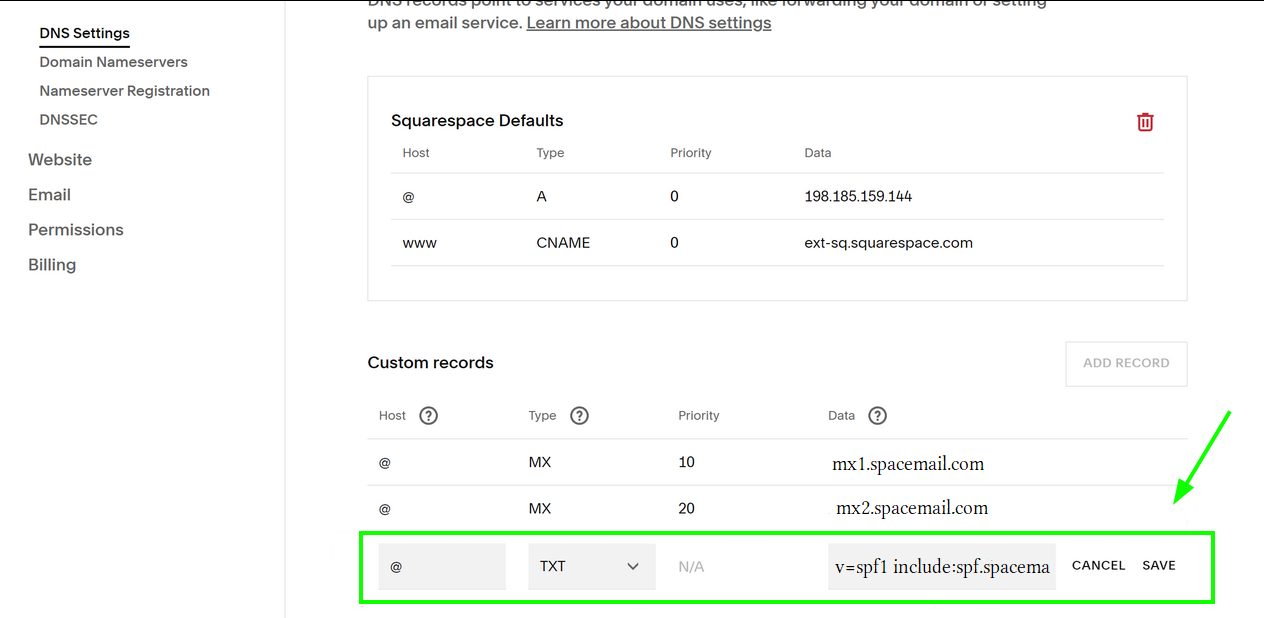
The DKIM record is a mandatory entry to ensure outgoing mail functions correctly. A DKIM record contains information about the domain, which is published by the domain owner. Emails signed with DKIM appear more legitimate to recipients and are less likely to end up in junk or spam folders.
To locate the DKIM record, go to the Advanced DNS application in your Spaceship account, click on the small arrow next to your domain name, scroll the page and locate Inactive Records:
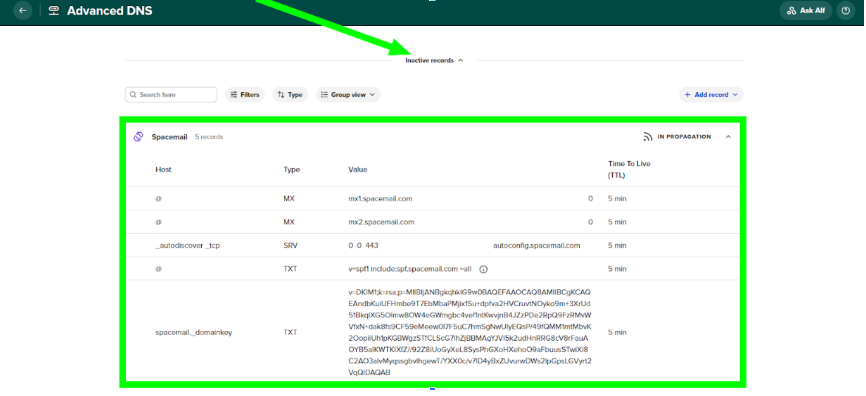
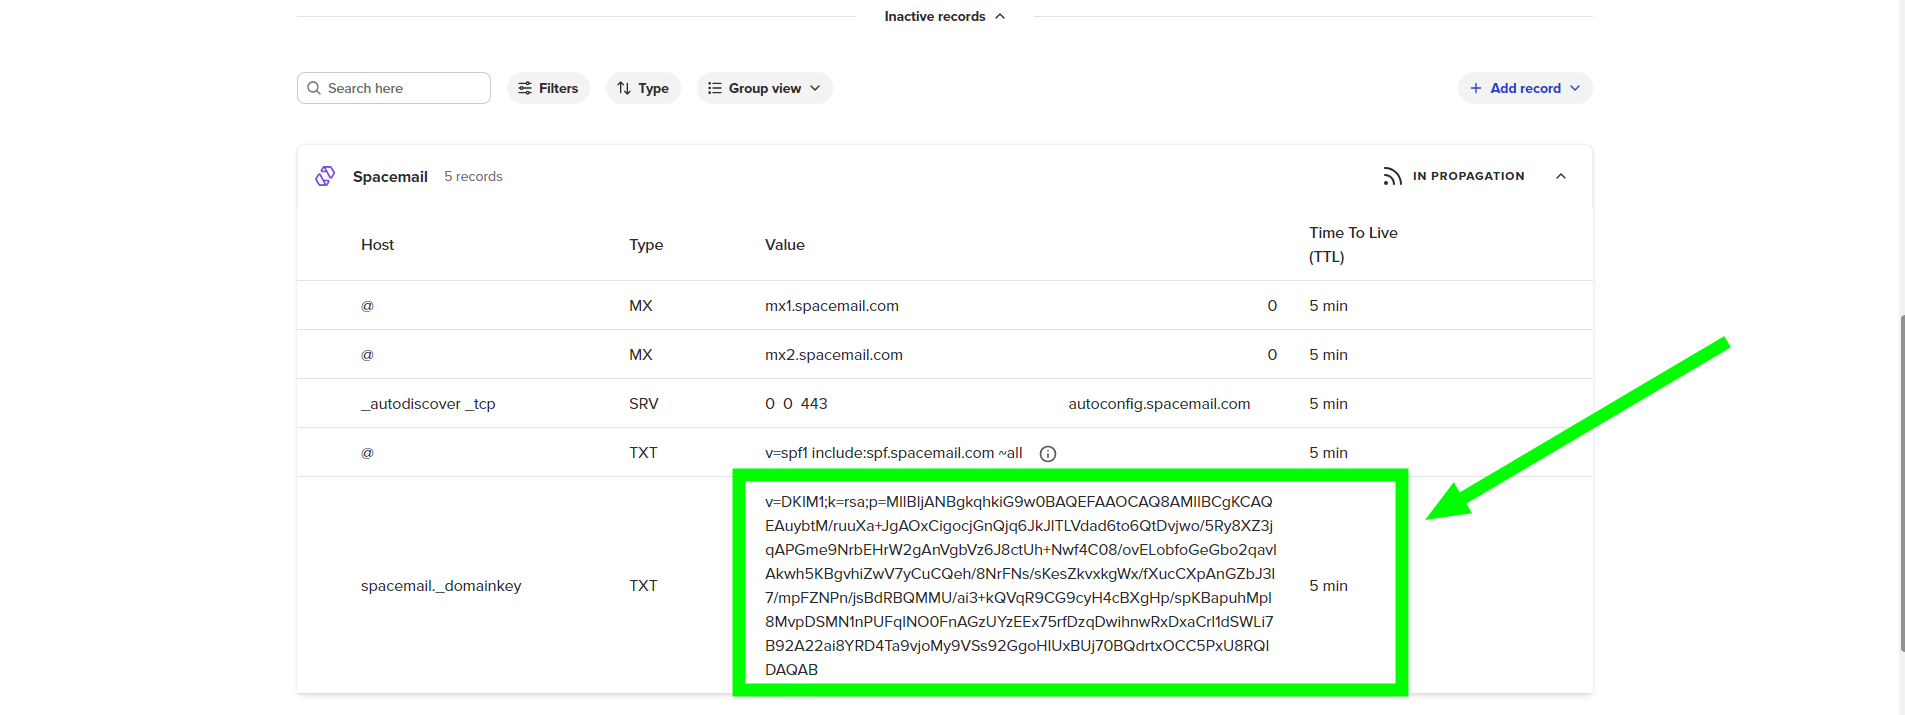
Locate the TXT Record with “spacemail._domainkey” Host and add it to your domain’s DNS zone as well:
Host: spacemail._domainkey | Type: TXT | Data: can be located on your end only, starts with ‘v=DKIM1; k=rsa; …’
NOTE: It is not possible to set up a 2048-bit DKIM on Squarespace because of their limitations. Contact our Support Team so we can manually recreate a 1024-bit DKIM for you:
Moreover, we strongly recommend configuring a DMARC record as well. Modern email providers (including Microsoft Outlook, Hotmail, Gmail, and Yahoo) increasingly rely on DMARC as part of their sender reputation and anti-spam validation systems. Domains without a properly configured DMARC record are more likely to experience deliverability issues, spam folder placement, or reputation-based restrictions.
To configure DMARC, you will first need to generate a DMARC record using an online DMARC generator tool (for example, MXToolbox DMARC Record Generator) and then add it as a TXT record to your domain’s DNS zone.
Type: TXT Record | Host: _dmarc | Value: v=DMARC1; p=none; rua=mailto@yourdomain.com (or the one generated using an online DMARC generator tool) | TTL: Automatic
NOTE: The DMARC policy can later be adjusted to quarantine or reject depending on your email setup and monitoring preferences.
Step 8. The SRV record is used for publishing services and service discovery. Its primary purpose is to allow services to run on non-standard ports and reduce the configuration burden when setting up email clients.
Host: autodiscover.tcp | Type: SRV | Priority: 0 | Data: 0 443 autoconfig.spacemail.com
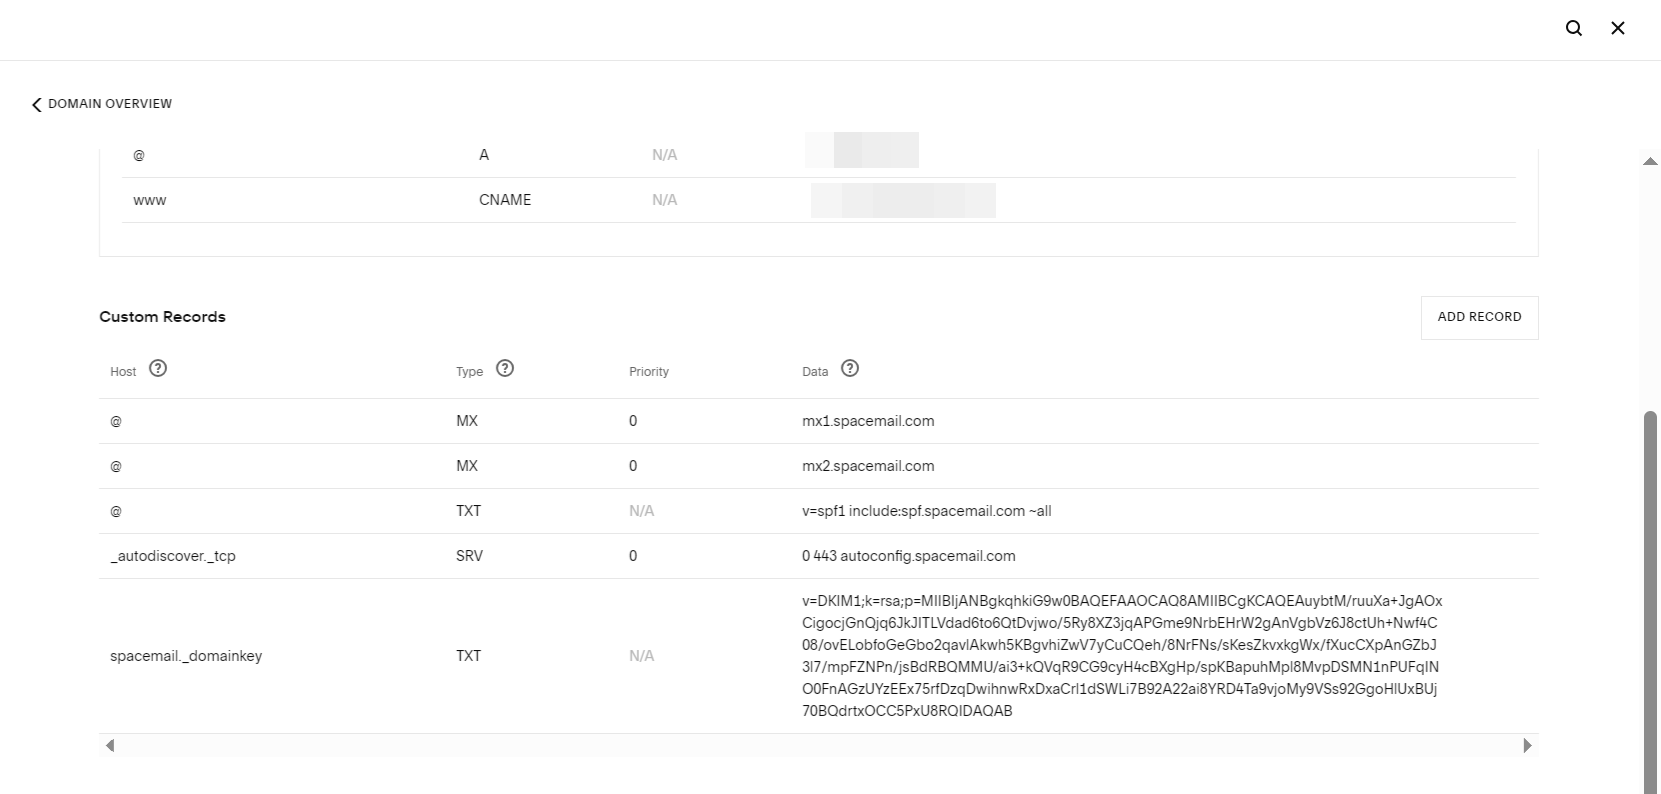
Here is what you’ll see in your DNS zone once all the records are added:
Please keep in mind: If your domain is registered with a third-party registrar, you'll also need to add the verification TXT record.
The verification TXT record can be found in the Advanced DNS application. Once there, click the Manage button, locate the "Configure your DNS settings for products to work correctly" section, and click "View guides". Then, scroll down and select "Verifying domain ownership".
Allow up to 1 hour for the records to propagate, and then check the functionality of your email service. You can use any online checker to see if the propagation is complete. Feel free to check it here.
That's it! If you have any questions or need some help, please contact us. Our customers are currently assisted 24/7/365 in Live Chat and via email.