How to set up FastVPN on ASUSWRT router
This tutorial will walk you through configuring FastVPN OpenVPN on ASUSWRT and will help you establish a permanent VPN tunnel from your ASUSWRT router.
The following is required for FastVPN to work with an ASUSWRT router:
A secure FastVPN connection (Don’t have one? Sign up here);
Internet access on the ASUSWRT router;
Access to your FastVPN Account Panel;
Admin access to the ASUSWRT router web interface.
Configuring the FastVPN via OpenVPN Client
The following is the step-by-step process involved in configuring the VPN:
1. Log in to the router control panel by entering the router’s default IP address 192.168.1.1 into the address bar of your preferred browser (If you change your router's default IP address, enter that into your browser instead). While connecting using 192.168.1.1, the URL may change to router.asus.com due to the default DNS configuration specified in the router.
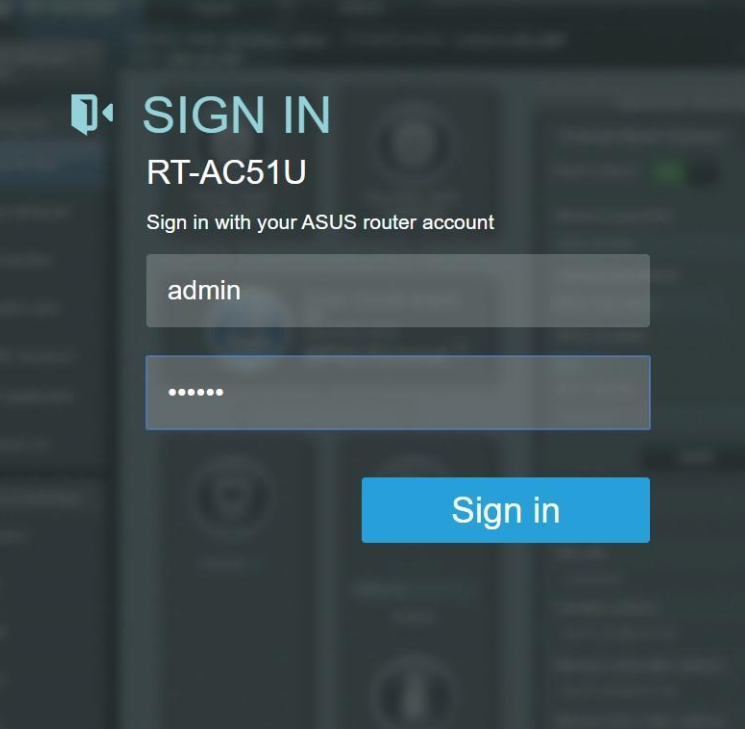
2. Sign in to the router using your router's administrator login name and password:
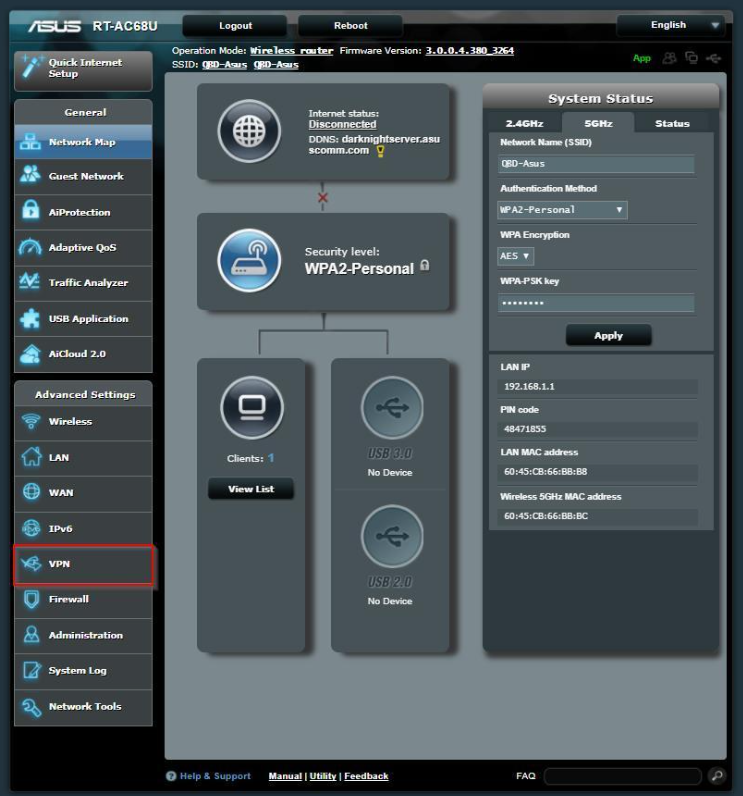
3. You will be redirected to the default setting of the ASUS RT-AC68U router (router.asus.com). To configure OpenVPN, navigate to VPN under Advanced Settings on the menu on the left:
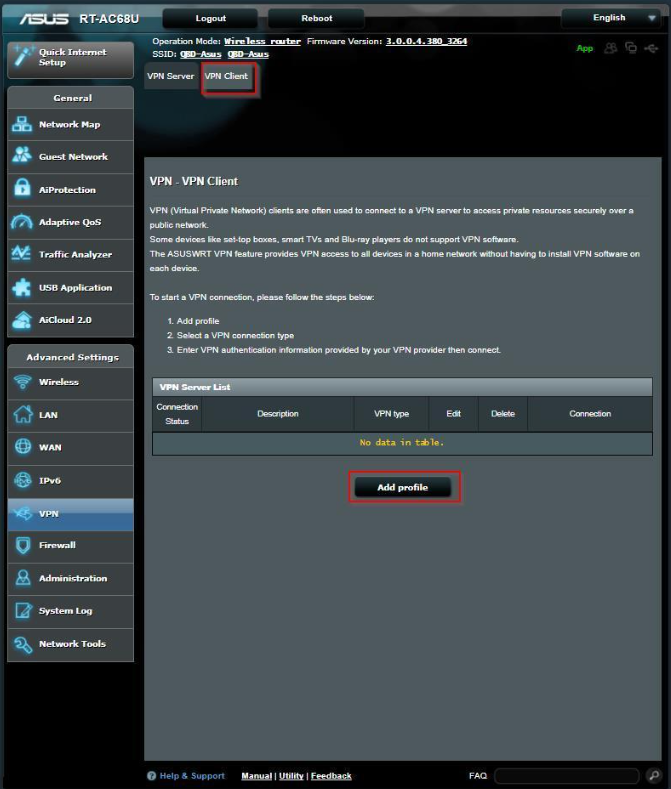
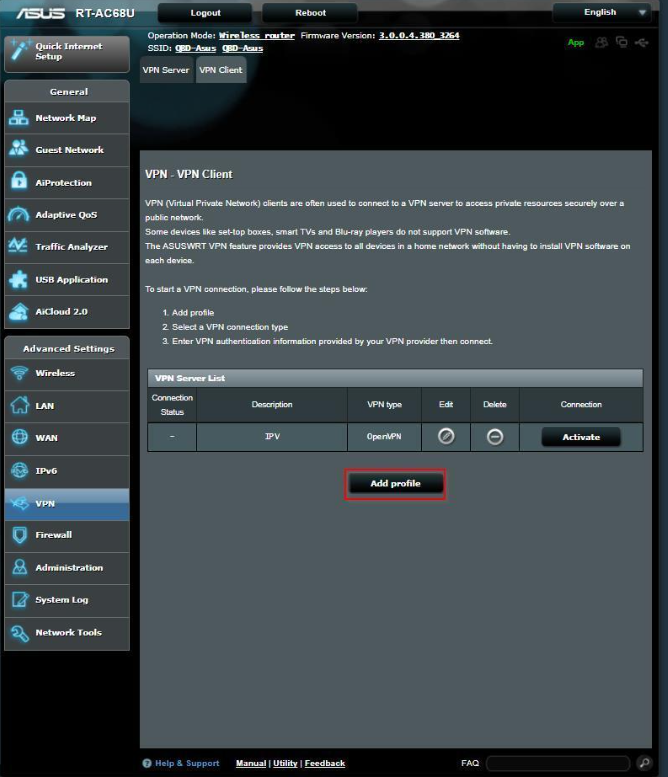
4. Select VPN Client at the top and click on Add profile:
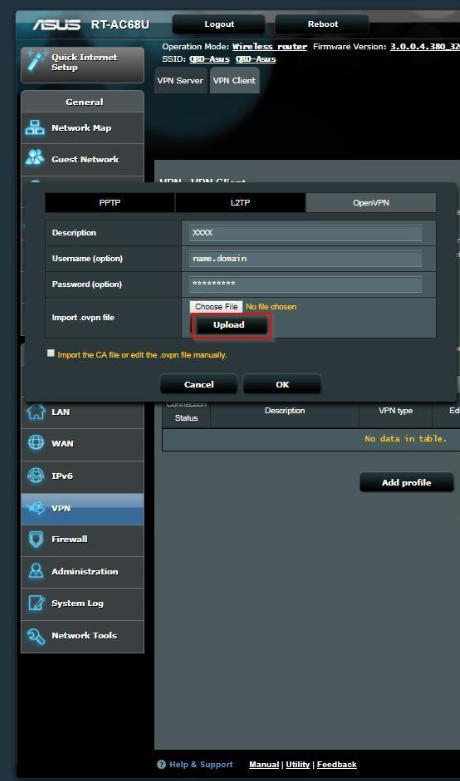
5. Select the OpenVPN tab in the window that appears. Provide a description (this will be the displayed name in your list of available VPN connections), and enter login credentials as required in the tab. Replace “name@domain.com” and “**********” with your username and password from the FastVPN Account panel:
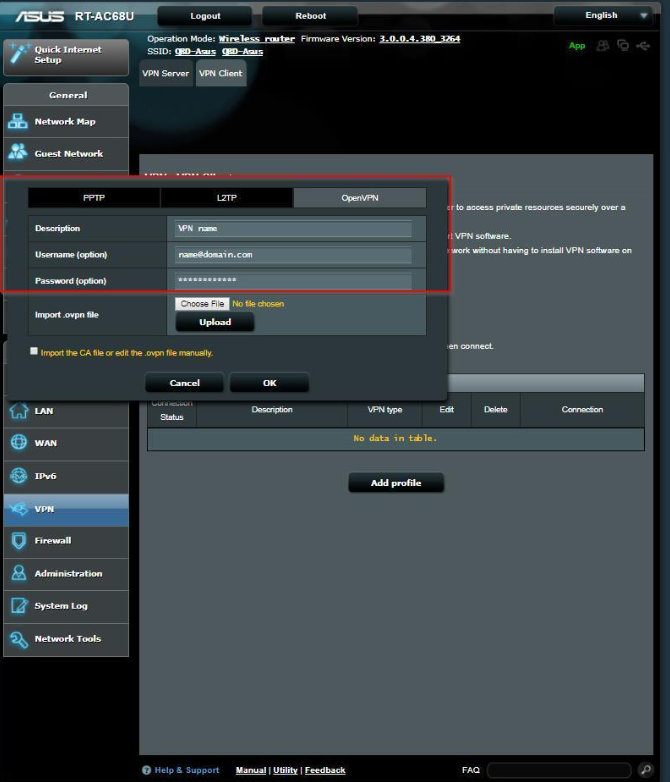
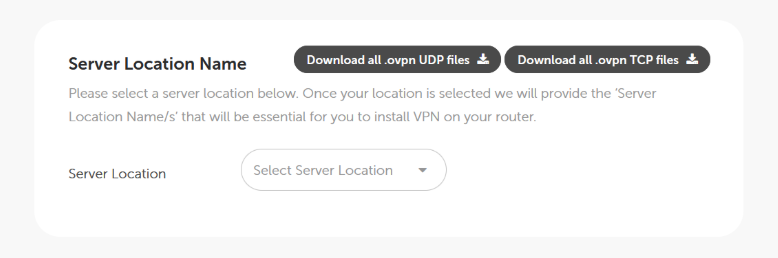
6. To complete the configuration, upload a config file that defines the settings or preferences for the OpenVPN connection.
You can download all of the config files for all of our servers directly from https://vpn.ncapi.io/groupedServerList.zip or from the FastVPN Account panel.
Note: If you are running OpenVPN 2.3 and older, you will need to apply the following change in the .ovpn file:
Change: "compress lzo" to "comp-lzo yes".
7. Click the Upload button to upload the OpenVPN config file of the required server:
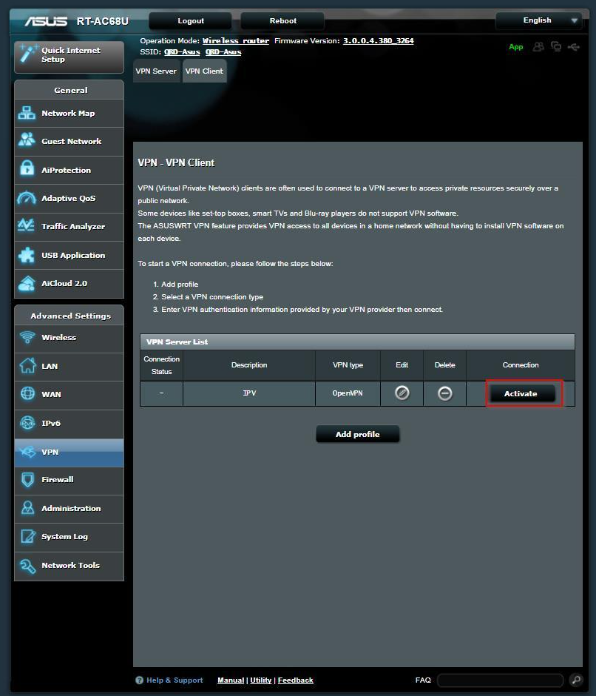
8. Click Activate to establish your new OpenVPN connection to FastVPN in ASUSWRT:
Verify the OpenVPN Connection is Working
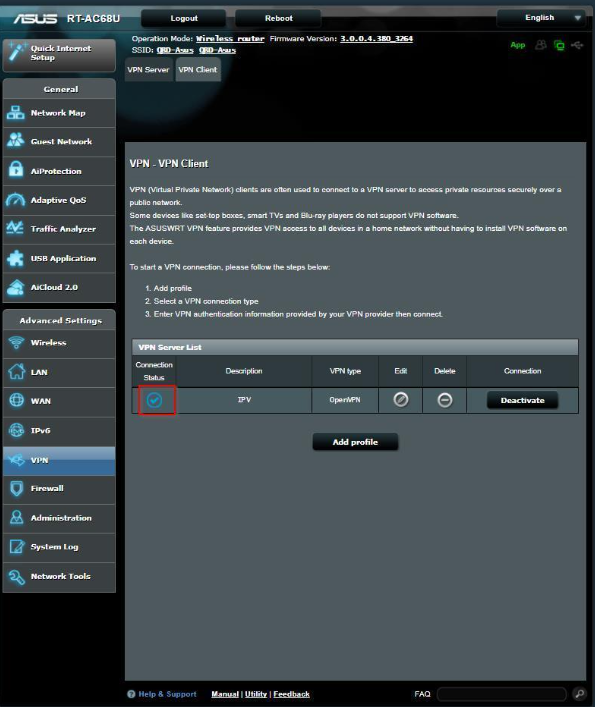
9. Click the Activate button to confirm your connection. The appearance of a blue check mark in the Connection Status will confirm that your new OpenVPN connection is connected and active:
10. Click on the Add profile button and repeat the steps from 6 and 7 to add more preferred servers:
Troubleshooting
11. If you see an X icon under the Connection Status, this is an indicator that something is not configured properly in the connection settings:
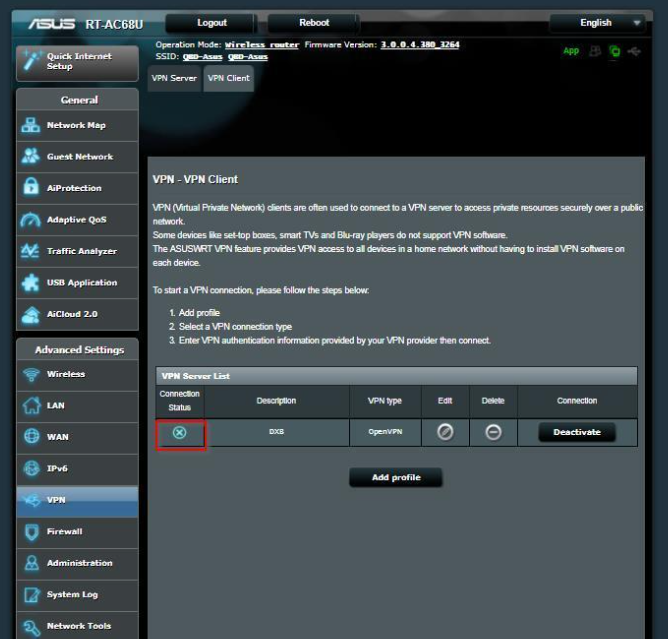
12. To fix the problem, repeat the setup above and double-check the user name, password, and other inputs provided. If it doesn’t fix the issue, navigate to the router’s log. The System Log will provide the log of the VPN connection process. You can share the log file with our Support Team to troubleshoot the issue.