How to set up FastVPN on DD-WRT v3 Router
The following is required for FastVPN to work with a DD-WRT v3 router:
A FastVPN account (Don't have one? Sign up here);
An internet connection to the DD-WRT router;
Access to your FastVPN Account Panel.
Before following this guide, you will need to install DD-WRT on your router. To do this, you will need to go to the DD-WRT router database and search for your router model number to see if your router is compatible or find a beta build for your router. This guide uses KONG's beta build of DD-WRT v3.0-r31520M on a Netgear R7000.
IMPORTANT NOTE: Certain beta builds may not work with OpenVPN. Please read the feedback in the build forum before installing a beta build. Also note that regardless of what model of router you have or version of DD-WRT you are installing, there is a chance of bricking your router (i.e., rendering the router completely useless) if the process of putting DD-WRT on the router does not complete properly. Please thoroughly read and follow the related documentation regarding the updating procedure for your router to minimize the risk of bricking your router.
Initial DD-WRT Setup and Important Notes
1. Please check and consider the following before setting up your VPN connection in DD-WRT:
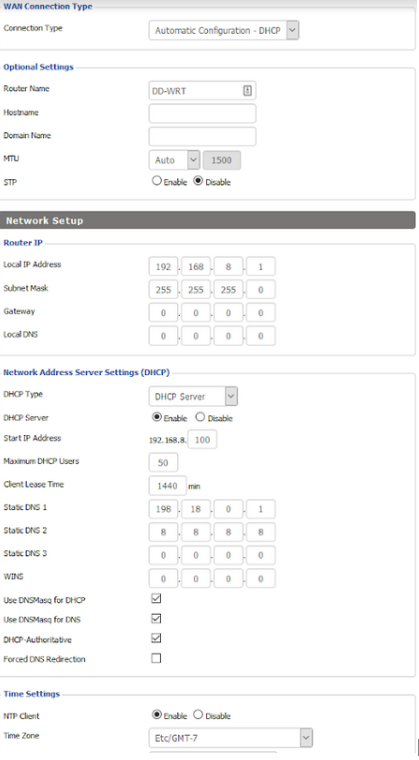
If you are running a router-behind-router configuration, you will want to make sure your DD-WRT router is on a different subnet than any other router/modem on your network. This can be done by going to the Setup/Basic Setup tab and changing your Local IP address to "192.168.8.1" without quotes.
We suggest adding the following static DNS addresses: 198.18.0.1 and 8.8.8.8, on the basic setup tab.
Please check to ensure the NTP client is enabled and set to the correct time zone, which can be found at the bottom of the basic setup tab.
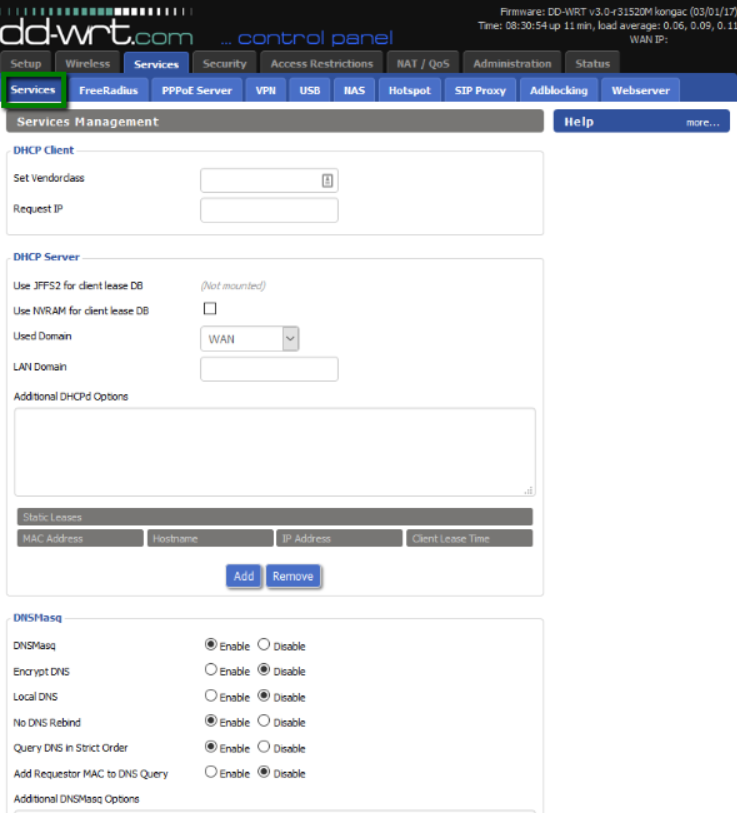
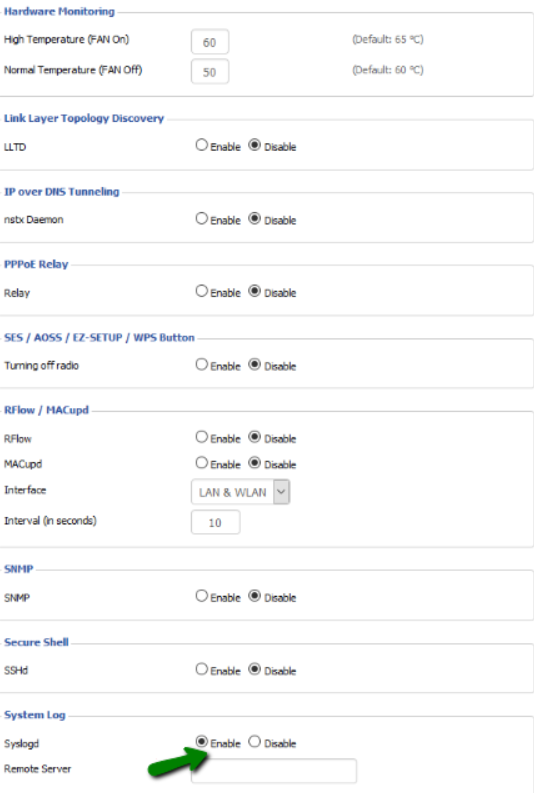
2. Enable Syslogd so you can get logs if you run into any trouble with your DD-WRT v3 VPN router setup. You can do this by going to the Services tab and scrolling down to System Log, then enabling Syslogd:
Configuring the VPN Connection
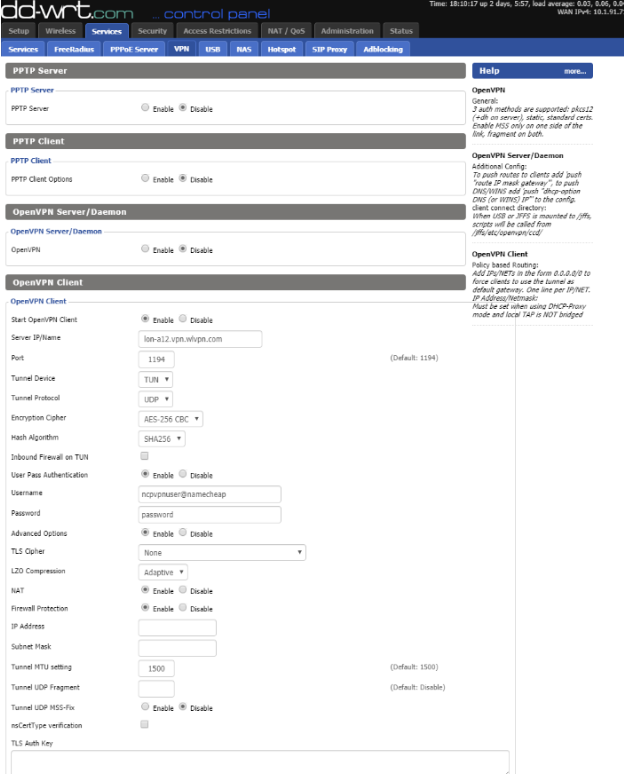
3. To set up the VPN connection on your router, go to the Services/VPN tab, enable the OpenVPN Client, and set the connection up using the following settings:
Server IP/Name: Choose a server location and enter the address in this field;
Port: use 1194 or 443;
Tunnel Device: TUN;
Tunnel Protocol: use UDP or TCP;
Encryption Cipher: AES-256-CBC;
Hash Algorithm: SHA256;
User Pass Authentication: Enable;
Username: username@namecheap, available from the FastVPN Account panel;
Password: FastVPN Password, from the FastVPN Account panel;
Server Address: Choose a server from our Server list in the FastVPN Account panel;
Advanced Options: Enable;
TLS Cipher: None;
LZO Compression: Adaptive;
NAT: Enable;
Copy and paste the following into your Additional Config:
persist-key
persist-tun
persist-remote-ip
keysize 256
remote-cert-tls server
CA Cert: Copy and paste the whole contents of the certificate.

4. Save and Apply settings, then go to the Administration tab and click Reboot at the bottom of the page.
Check the VPN Connection
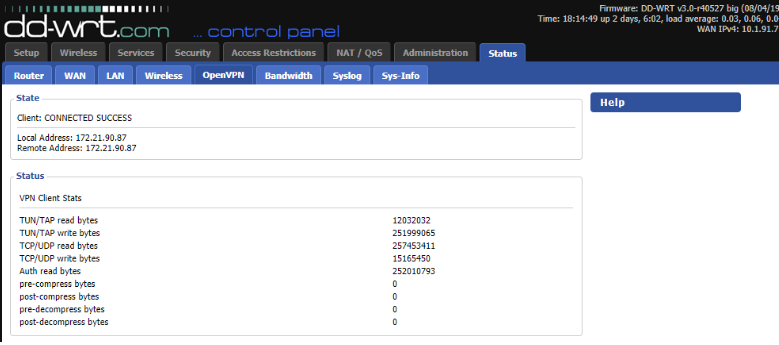
Once your router has finished booting up, verify you are connected by going to the Status/OpenVPN tab and checking the IP at https://www.whatismyip.com/ and validating on ipinfo.io that you are in the proper location.
If you have any questions about this guide, please contact our Support Team.