How to configure OpenVPN on CentOS Stream
This guide describes the setup of the OpenVPN connection type on CentOS Stream. The guide uses CentOS Stream 9 for demonstration purposes.
The following is required to set up OpenVPN on CentOS Stream:
A secure FastVPN connection (if you do not have one, you can sign up for VPN service);
Access to the FastVPN Account panel in order to get your network credentials and server list.
Follow the steps below to configure OpenVPN on CentOS Stream.
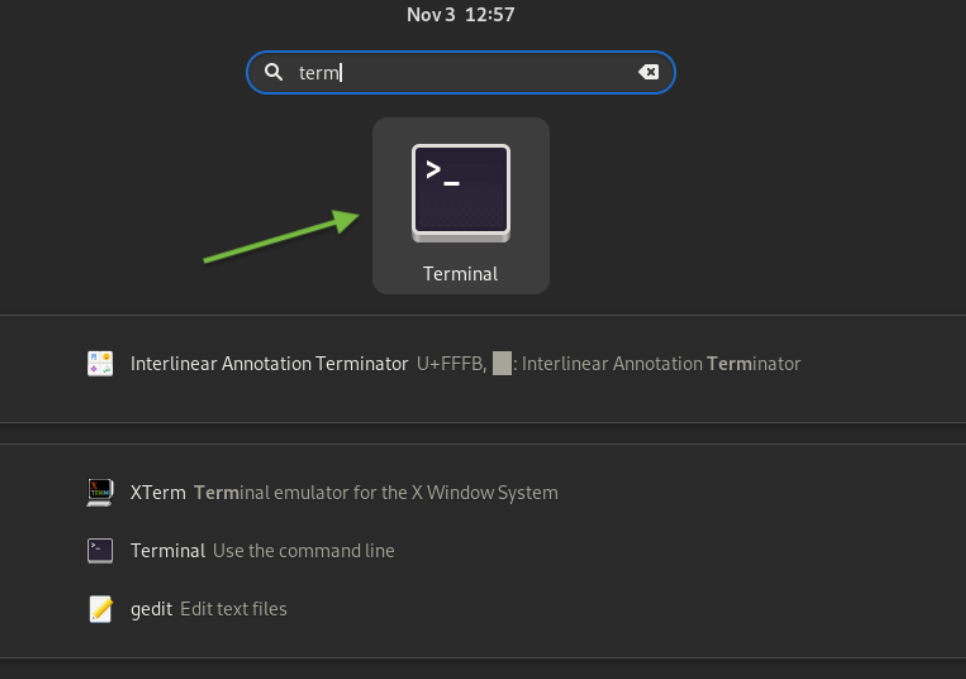
1. Access the Terminal on your CentOS Stream machine:
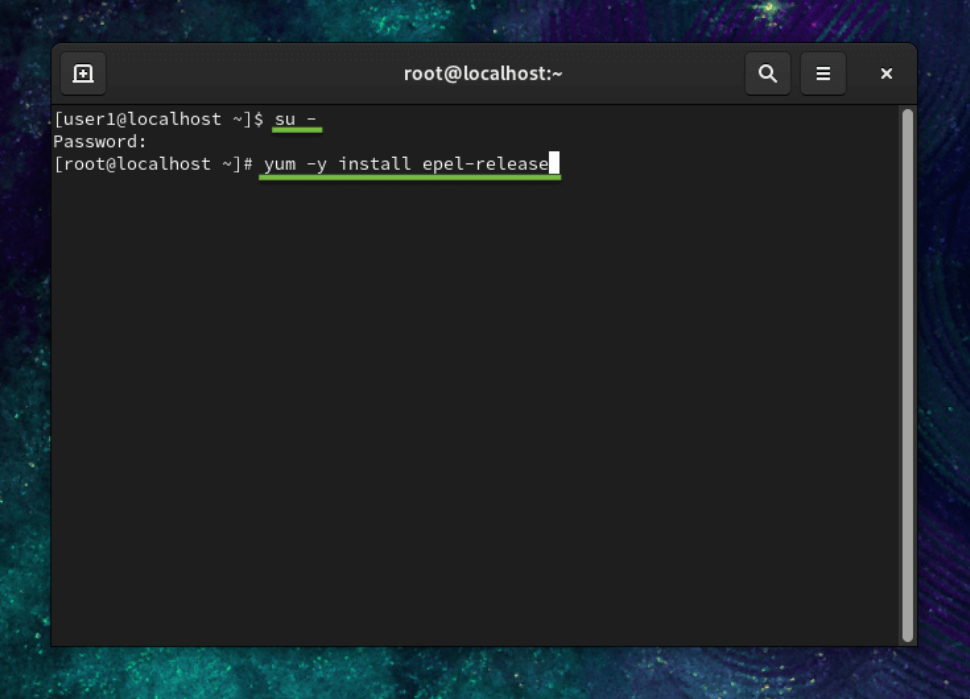
Switch to a root user and enter the following commands to install the OpenVPN plugin for Network Manager:
su -
Type in your root password and press Enter:
yum -y install epel-release
Press Enter and type in the following:
sudo yum -y install NetworkManager-openvpn NetworkManager-openvpn-gnome
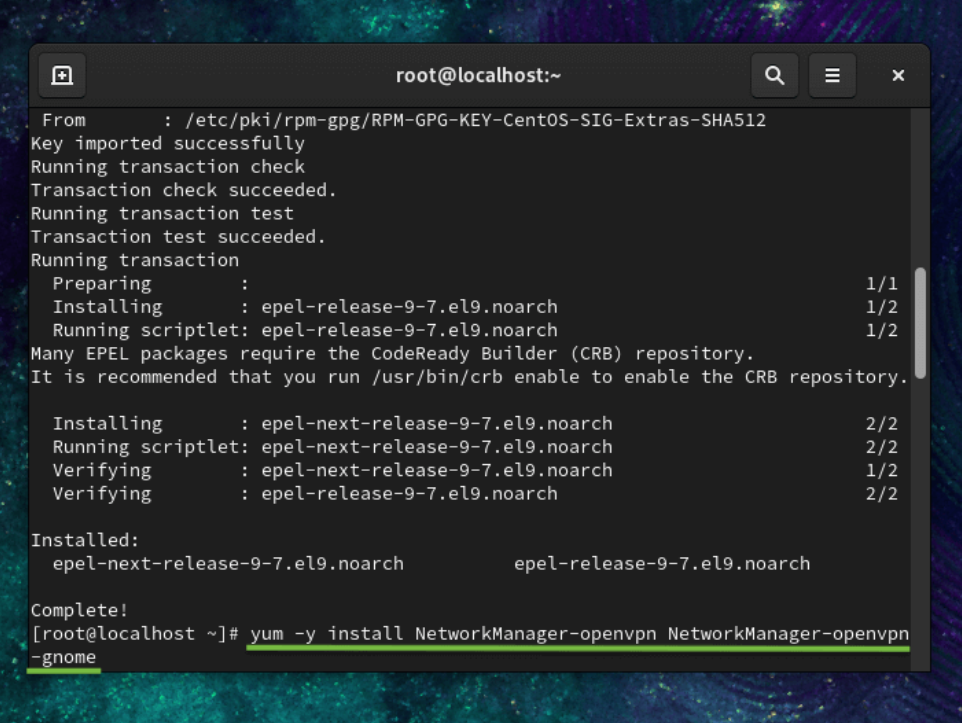
Press Enter once again.
2. The next step in setting up the OpenVPN client on CentOS Stream is to obtain the ovpn configuration files.
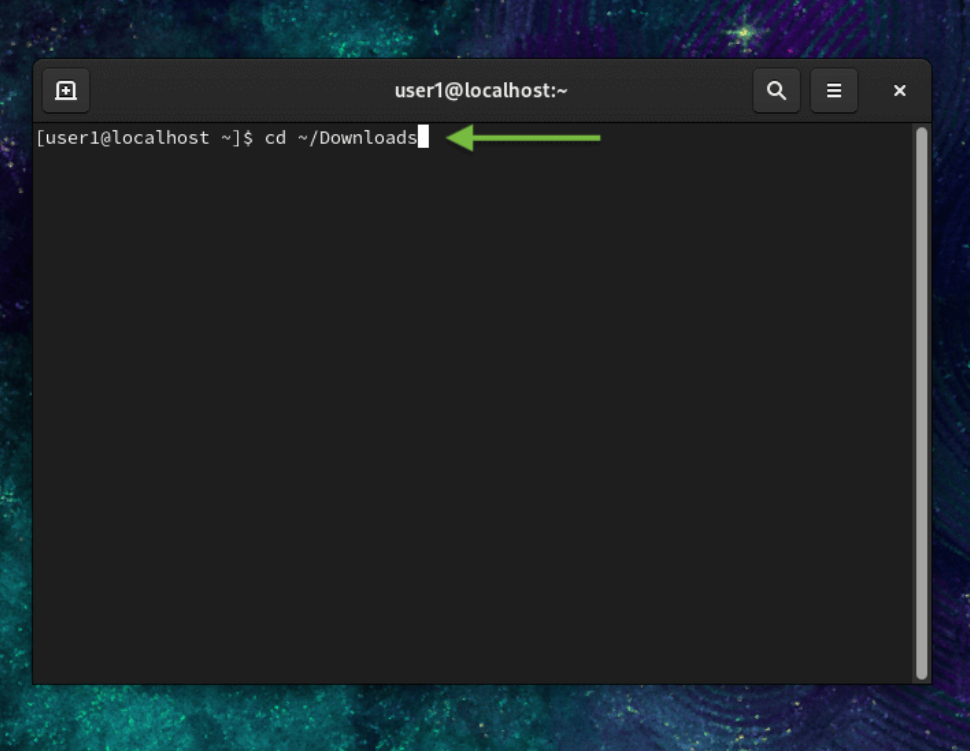
Enter the following command to select a folder for FastVPN configs:
cd ~/Downloads
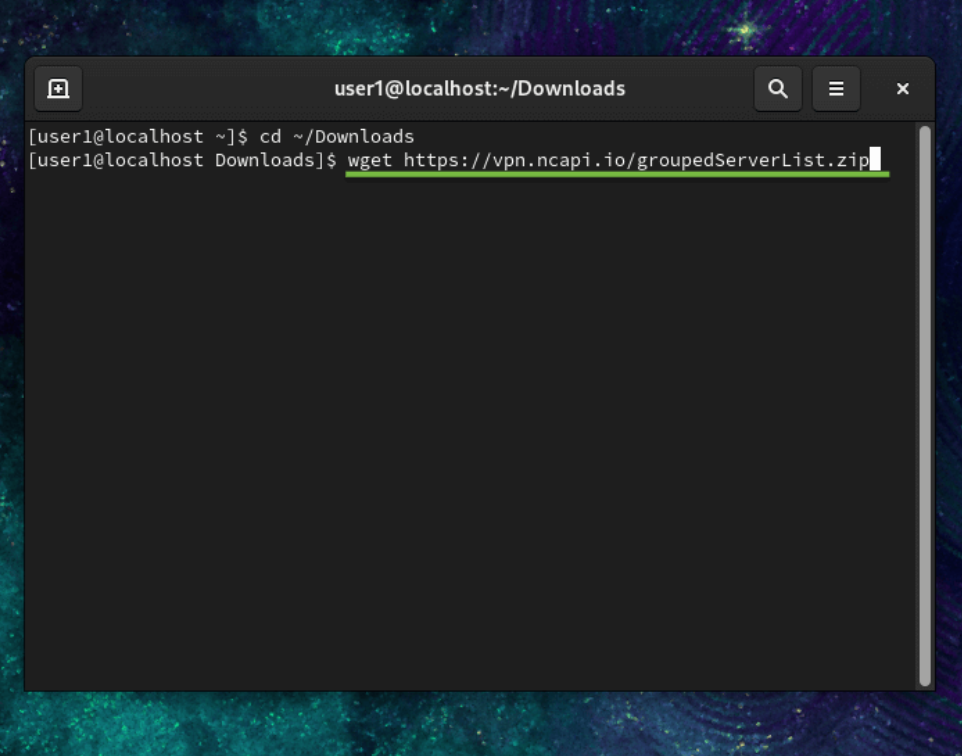
Type the following command in the terminal window to save the FastVPN OpenVPN groupedServerList.zip file from our repository:
wget https://vpn.ncapi.io/groupedServerList.zip
Unzip the config files into sthe elected directory by typing the following command and pressing Enter:
unzip groupedServerList.zip
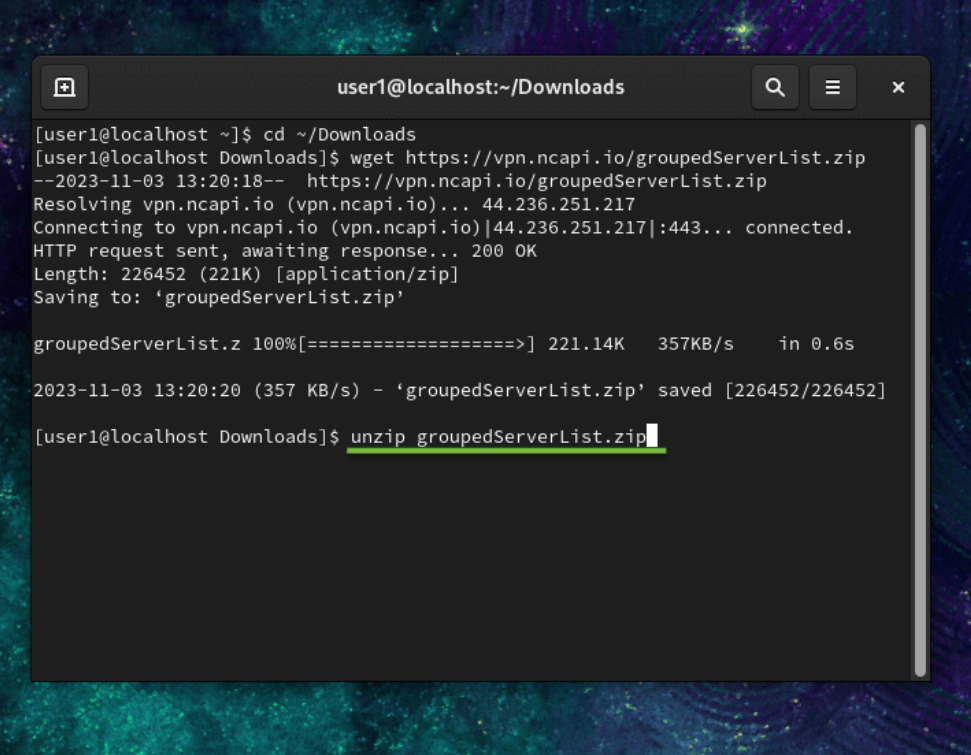
The previously entered command will unzip the downloaded configuration files. It will be shown in the terminal window, similar to what is shown in the screenshot below:
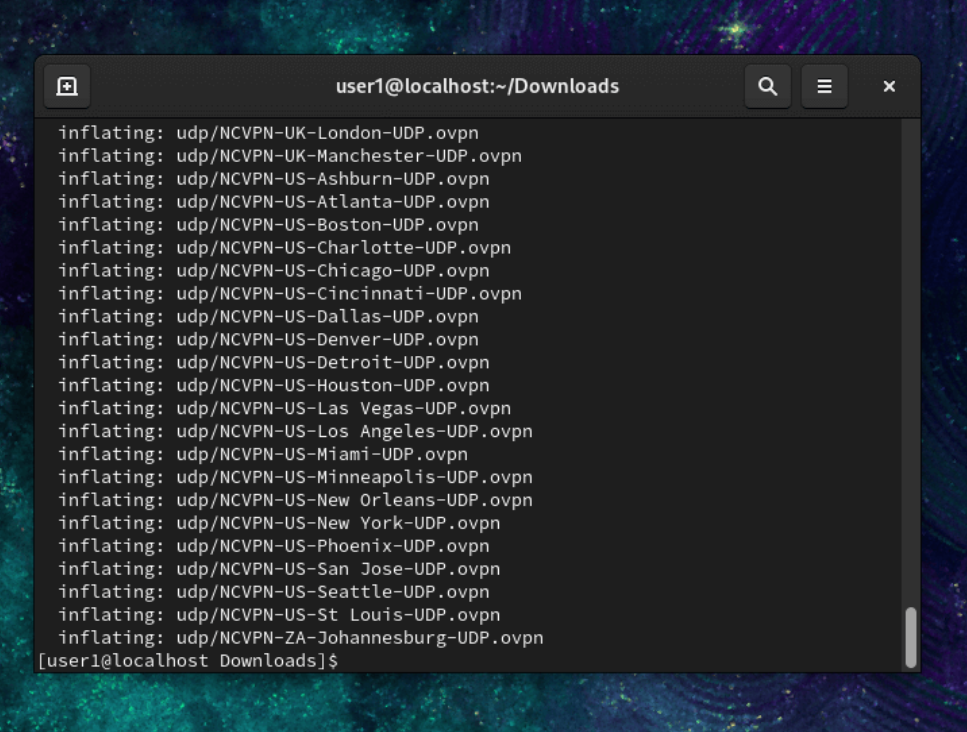
After the unzip is complete, and the prompt appears, move to the next step.
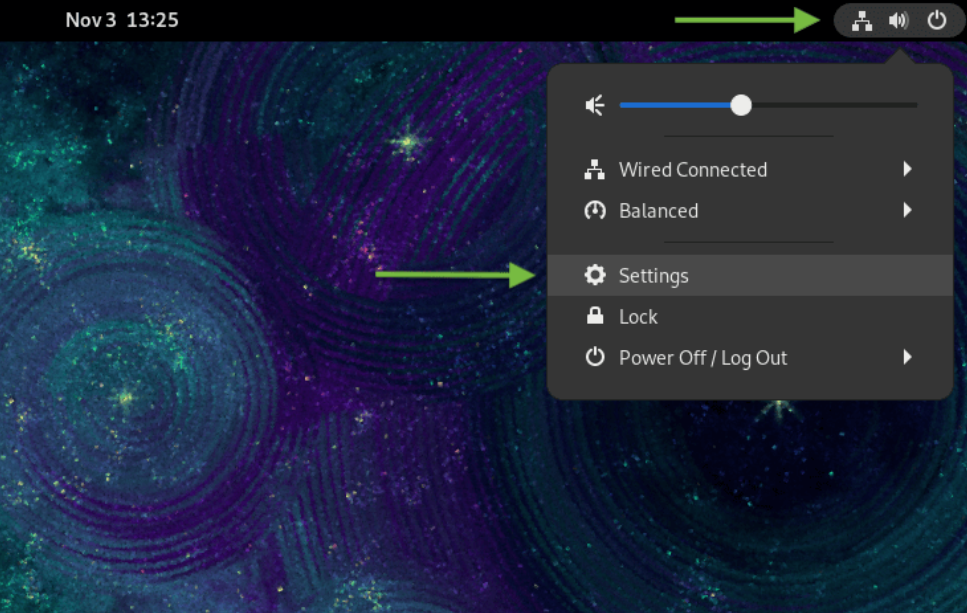
3. Close the Terminal window, click on the Network icon in the top right of the screen, and then select Network Settings:
4. In the Network section, click the + button and move on to the next step:
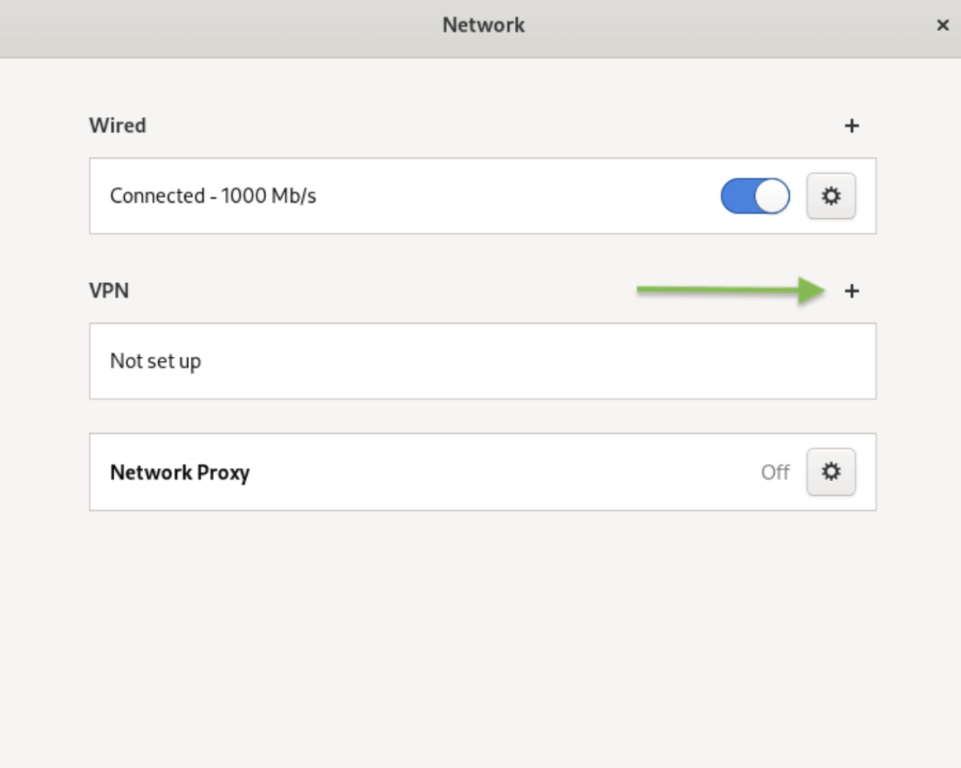
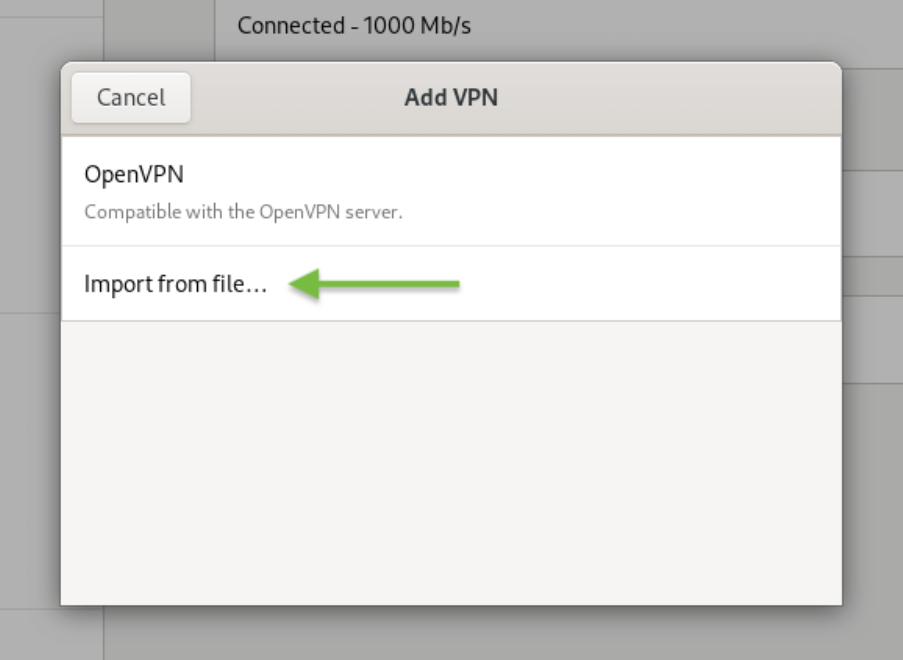
5. Click Import from file…:
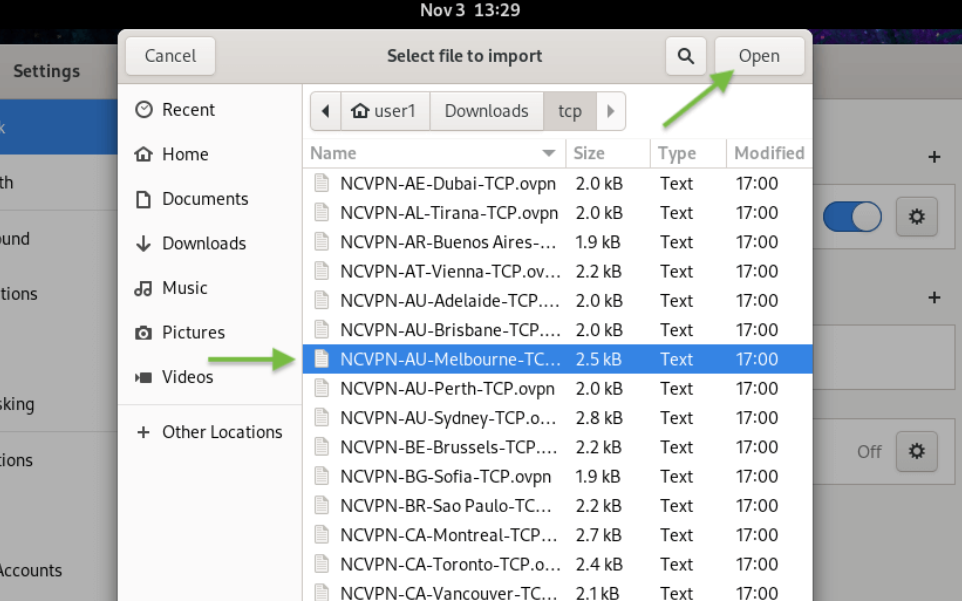
6. Select your preferred TCP or UDP OpenVPN configuration we downloaded earlier from your Downloads folder (e.g. NCVPN-AU-Melbourne-TCP.ovpn item).
Once the configuration file has been chosen, click the Open button in the top right corner, as shown below:
7. The previously selected OpenVPN config file will have been imported into the Add VPN window. Confirm the following information is correct:
Enter a desired connection name in the Name field;
The server address in the Gateway field;
Type: Password;
User Name: FastVPN Network Username from the FastVPN Account Panel;
Password: FastVPN Network Password from the FastVPN Account Panel.
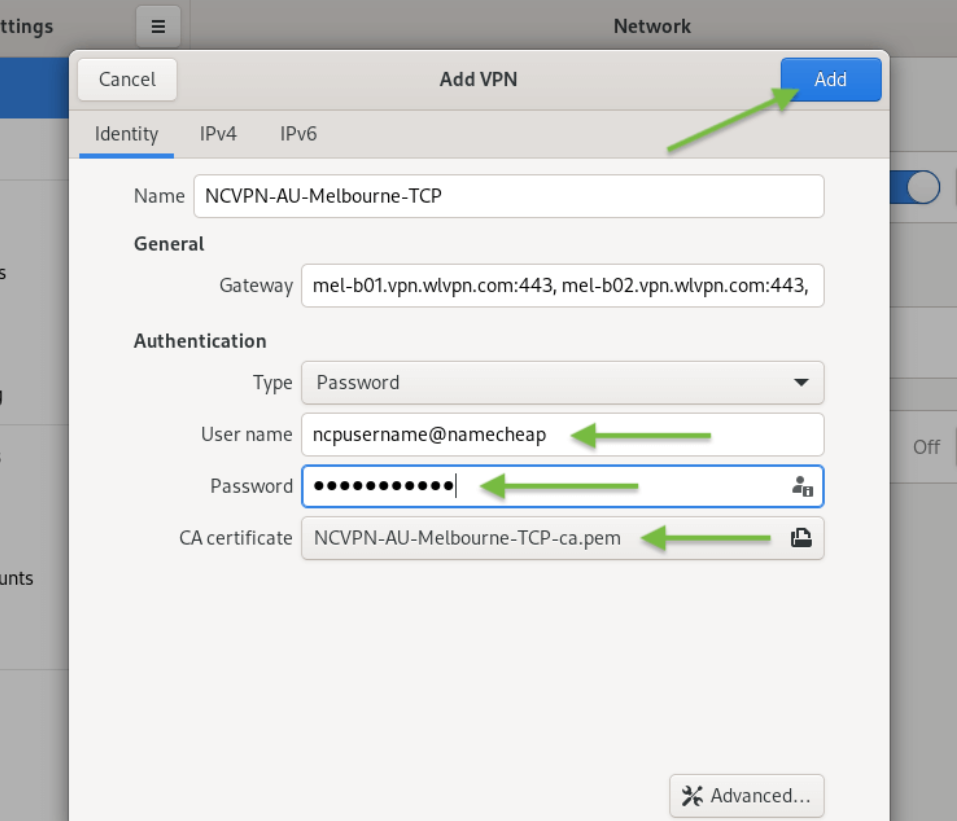
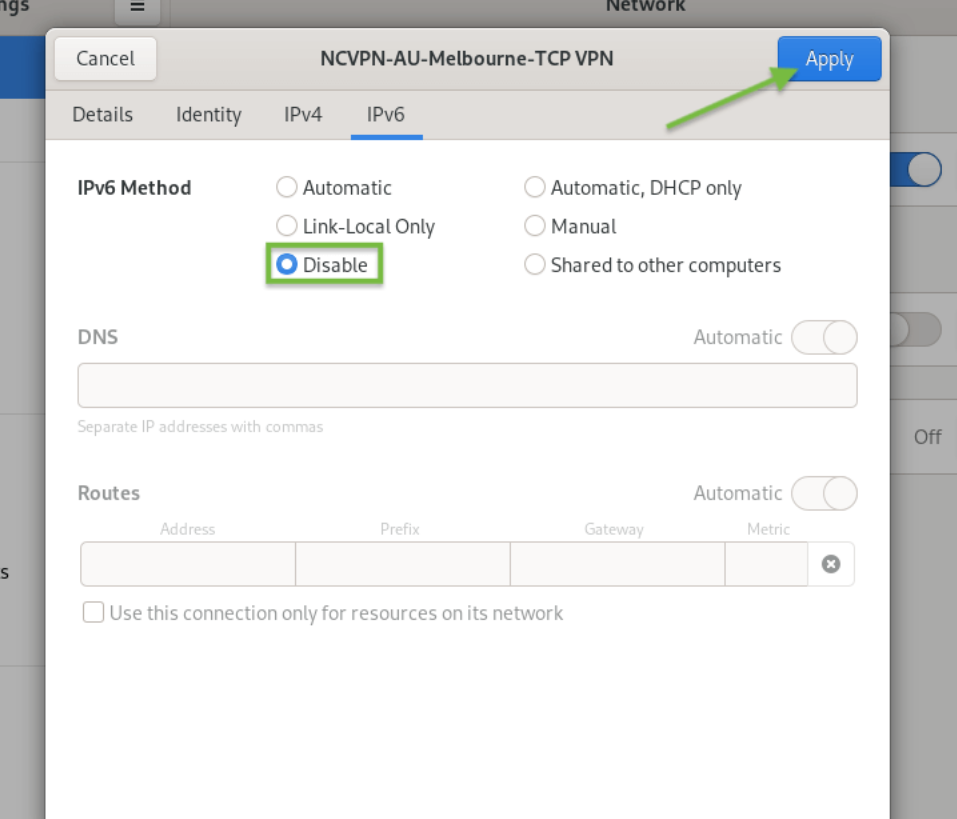
Click IPv6 in the menu on the left, disable IPv6 (as shown below), then click the Add button:
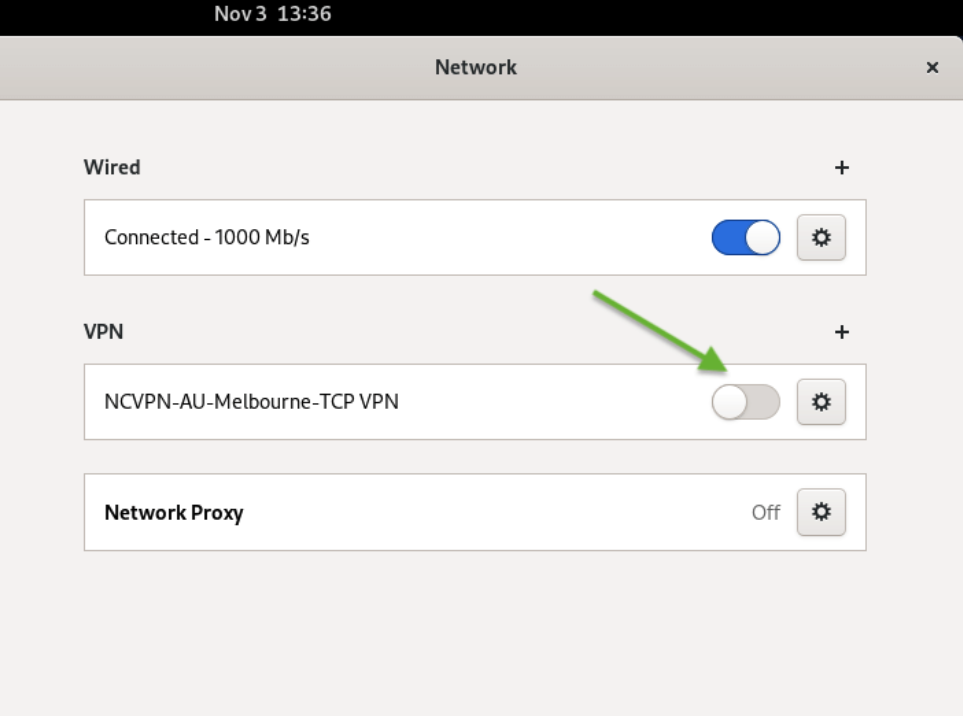
8. With your new OpenVPN configuration installed, you should see the newly created FastVPN OpenVPN connection listed in the menu on the left in the Network window. Click the VPN connection slider switch to activate the VPN to connect to FastVPN:
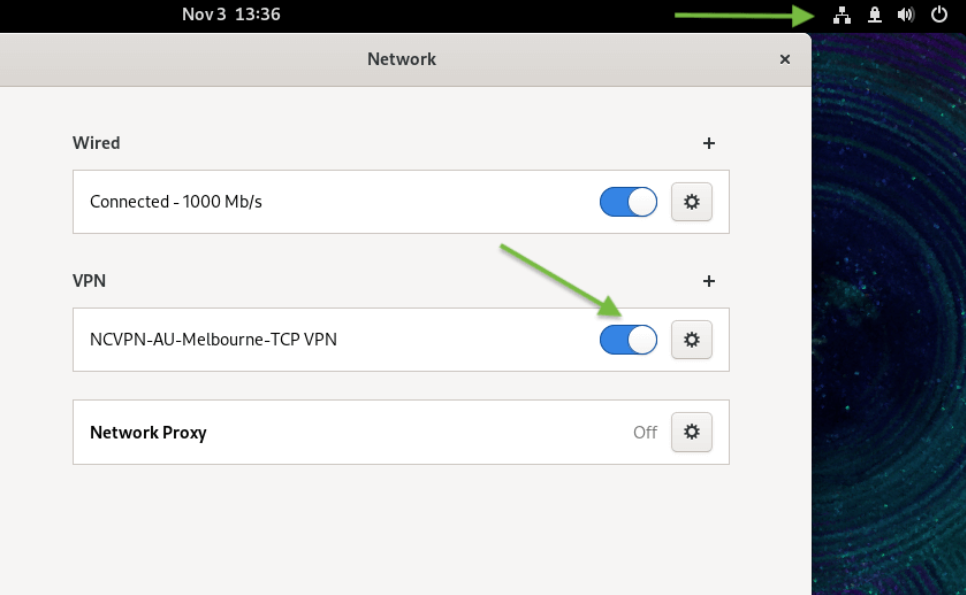
9. If the VPN connection is successful, you will get a message after toggling the VPN connection to the ON position, as shown below:
To confirm that your IP address has changed to an anonymous and private FastVPN IP, open your web browser and go to https://www.namecheap.com/vpn/what-is-my-ip/
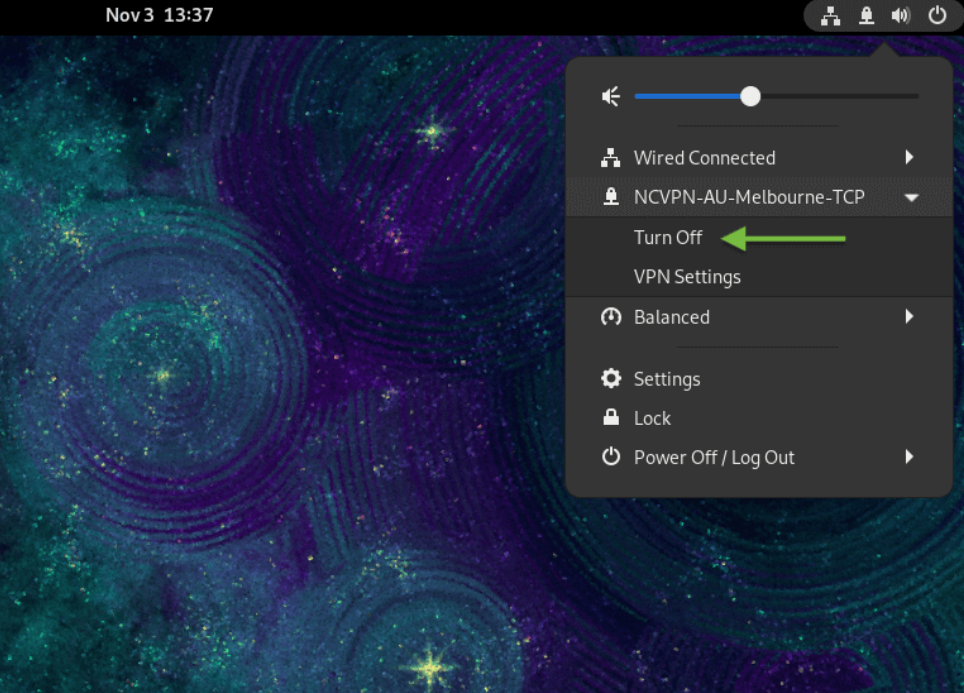
10. To disconnect from FastVPN, select VPN Connection and click Turn Off:
If you need any further assistance, please contact our Support Team.